
Article by Colette Nichol, Solo Filmmaker and Story Strategist
Estimated reading time: 27 minutes
In this article, I’m going to help you avoid the biggest filmmaking mistakes that make low-budget and zero-budget movies look cheap.
You can make hundreds of filmmaking and movie mistakes as a filmmaker. But luckily, if you do your pre-production right, you can avoid many of them.
That said, even experienced professionals with multi-million-dollar budgets make mistakes. So don’t sweat it. If you screw something up, you can usually fix it. Or just hope that nobody notices on the first watch of your movie! What they notice on the second watch is not your problem. 🙂
[ Imagery in this post is from Back to the Future, The Godfather and Vertigo, used for educational purposes only. ]
Filmmaking Inspiration Story
I’m 16 years old, glued to the screen of my 13-inch television.
It’s midnight.
I’m watching a slow-paced thriller full of elegant Americans. I missed the opening, so I don’t know the director or the title of the movie. But as the film progresses, it slowly dawns on me.
I know who made this movie.
How can that be? I didn’t see the opening credits. How can I possibly know who directed a movie that’s 50 years old? Especially when I’m a total movie newb.
I didn’t grow up with a television, so at 16, I’m embarrassingly behind when it comes to pop culture, movies, and TV.
But I’m SURE I know exactly who is standing next to the camera calling the shots. And suddenly, I can’t wait for the movie to end so I can see the credits and find out if I’m right.
An hour and a half later, my hunch is confirmed.
Alfred Hitchcock.
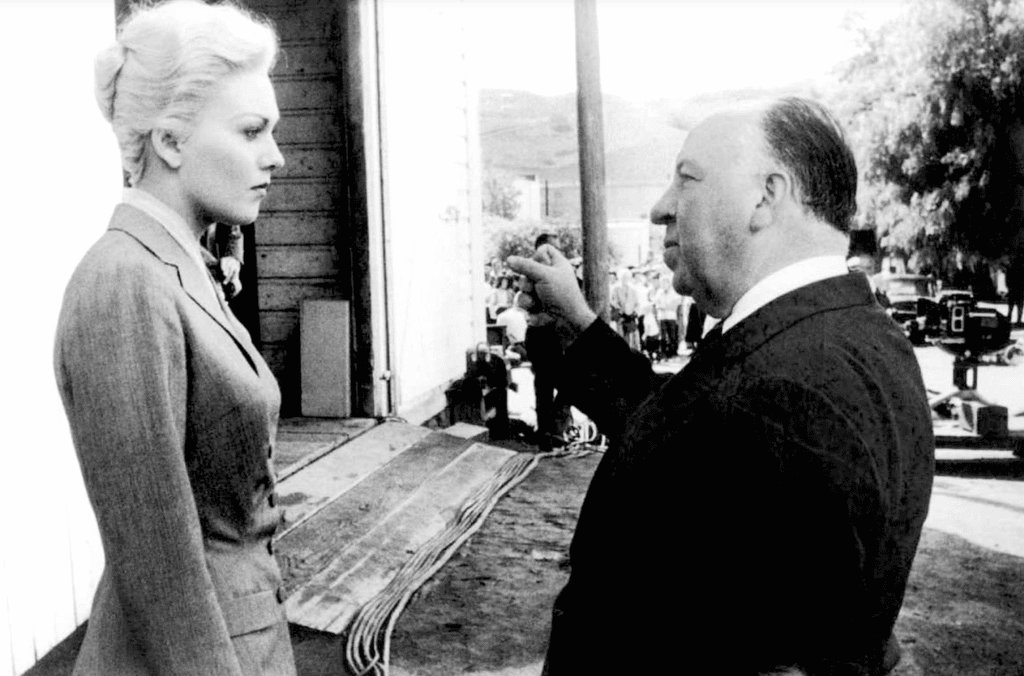
I’d been watching Hitchcock movies for the previous few weeks. But until this evening, it had never occurred to me that a director’s style could be so specific that without seeing their name on the screen, you could KNOW that he was the one who made it.
This floored me, and I think it was the moment I became interested in making moving images.
Why was this so exciting?
Because it told me that as a movie maker, you could also be an artist. You could put your stamp on a movie. You could express yourself creatively within the construct of a story and fascinating imagery!
For a girl living in the countryside surrounded by coyotes, rattlesnakes and farmers, this was a mind-expanding discovery.
I think most of us are drawn to making movies because we desire to express ourselves.
We want to make art that reflects our worldview, how we feel, and who we are.
But something often gets in the way of going from dream to reality.
FILMMAKING MISTAKES IN THIS POST:
1. Location and scene not styled.
2. Subject or talent too close to the walls.
3. Wardrobe too low-status or generic.
5. 4k footage shows everything (even stuff you don’t want).
6. Awkward unmotivated shadows.
7. Bad acting–and how to fix that!
9. Hair is wrong for the character.
11. Distracting colours and objects.
14. Insufficient natural sound.
15. No music, or not the “right” music.
What’s Getting in the Way?
But something often gets in the way of going from dream to reality.
There’s life. Our job. Time. Money. And knowledge…do we know enough to get started? Should we even bother with getting started with filmmaking?
And then there’s the two-horned beast of perfectionism and fear.
But I believe that if you truly want to make moving images, you should go for it.
Don’t let anything stop you. If you have a little knowledge and the desire to make something happen, you can do it.
So today, we’ll cover 17 movie mistakes to avoid when you make your next film. The point isn’t to scare you into not making a movie. But rather to arm you with a vision of the potential problems so you can prevent them from happening.
Filmmaking is all about planning.
Yeah, I know that doesn’t sound sexy. But it’s the truth. The better your plan, the better your final product. So let’s get into it!
17 Filmmaking Mistakes that’ll Make Your Ultra-Low-Budget Movie Look Cheap
1. Location and scene are not styled.
Many new filmmakers don’t realize how much styling goes into making a space look and feel aligned with the characters and story.
With the stress of deciding what camera to use and how to get your actors to give you a killer performance, it’s common to forget that the cheapest way to increase production values is to style your location.
When a location hasn’t been styled, it often feels random, there are objects that kill the framing of your shots, and the image feels flat.
Fix: Always dedicate an hour or more to styling interior locations.
Visit the location in advance and plan the look before shoot day.
2. Subjects or talent are too close to the walls.
Thinking in terms of depth is the key to creating imagery that draws your viewer into a scene.
The frame instantly feels flat and cheap when talent is placed right next to a wall in the majority of the shots (or even just for an important dialogue scene). It can feel claustrophobic or tense rather than inviting.
You’re unable to achieve shallow depth of field when your talent is too close to a wall, and you often end up with awkward wall shadows if you’re using studio lights.
Fix: Shoot into the corners rather than into the walls, and look for depth.
Corridors, hallways, arches, and long rooms are great.
3. Wardrobe is too low-status or generic for the character.
One big problem with creating films about “high-status” characters, i.e. the wealthy and powerful, is that you cannot sell the character to your audience without the perfect wardrobe.
But since most ultra-indie filmmakers don’t have friends with closets full of Armani suits, it’s common to see high-status characters wearing $100 suits in low-budget movies.
Whether someone is into designer clothes or not, almost everyone can read the status of someone based on their clothing. It’s something we all do every day. So you can’t fake out the audience when it comes to wardrobe.
Fix: Don’t make your zero-budget movie about someone rich unless you have wealthy contacts with a wardrobe they’re willing to spare.
Make your next zero-budget movie about people similar to those you’ll be casting—they’ll already have the wardrobe! Or, make a documentary.
4. Makeup is in the middle zone or scary bad.
Argh, makeup!
Not something most filmmakers want to think about. But as soon as you shine studio lights onto someone’s face, you have a problem. At its core, movie makeup is there to eliminate shine and smooth out the skin-tone inconsistencies that most of us have. That’s why men wear makeup in movies, not just women.
One problem you see in ultra-low-budget movies is makeup that is not quite what you’d wear on the street but not fully executed movie makeup. This just makes the characters look cheap. It looks neither realistic nor stylized.
Fix: There are three ways around this. First, you can go with zero makeup and shoot in natural light.
That’ll be fine if this fits your story and you don’t shove a 4k camera right up into someone’s pores. Next, you can use a lot of super soft light (softboxes or china balls), which wraps around the human face and smooths out texture and skin tone.
Fun fact: it takes A LOT of foundation and powder to get an even look and kill the shine if you’re shooting under lights.
5. Your 4k footage hasn’t been softened, and your talent’s pores and nose hairs are visible!
Dang, this is distracting.
If your talent’s pores and nose hairs are visible in your close-ups, that’s a problem. Think back to your favourite movies. Did you ever see the actor’s pores or nose hairs? Probably not, right? While 4k is wonderful, it also has some major downsides. Mostly that the footage often looks un-cinematically (not a word) crisp. We see things we don’t need to see.
Fix: It’s easy to fix this in post, especially using a super cool DaVinci resolve trick that smoothes mid-tones while leaving the highlights and shadows intact.
You can also add grain to your final piece to reduce the unnatural crispness of 4k. But, beyond that, it’s important to be aggressive when you analyze a close-up or extreme close-up shot during production.
Some things cannot be removed in post. While you probably can’t tell a documentary subject to go trim their nose hairs or reduce the size of their pores, you can choose to shoot a medium instead of a close-up.
Problem solved!
So, which of these mistakes have you made?
Or, if you haven’t started filmmaking yet, which of these have you seen in the wild?
For me, it was #2.
I stuck people too close to the walls longer than I’d like to admit. But once I began understanding the concept of depth, my image-making got a hell of a lot better.
OK, let’s keep going!
6. Awkward shadows not motivated by story or style.
The key to lighting is motivation.
You’re either motivating a studio light source with an existing light source like a lamp or the sun. Or you’re motivating your lighting based on the style of the movie.
Think of film noir for a moment.
That style of lighting isn’t motivated by the existing light sources. It’s sharp hard lighting that’s motivated by the style and feeling of the film.
When you’re thinking about cinematic lighting, you’re really thinking about shadows and how you want to shape them.
Do you want soft and gentle shadows are sharp and crisp shadows?
In low-budget movies, it’s not uncommon to see odd or awkward shadows that aren’t motivated by an existing light source, the story, or the style of the film.
Fix: Think about the look you want your film to have, and consider the style of shading you’d like to see based on the feeling and the story.
Then watch out for weird shadows on your talent’s face, particularly in close-up shots. When in doubt, you can hide a myriad of sins in a medium shot rather than a close-up. Also, it’s easier to do soft and natural lighting than film-noir-style hard lighting. So for your first film, opt for a more natural look.
There are plenty of film lighting types and techniques you can learn, but it’s best to keep it simple when working with zero budget.
7. Bad acting.
Bad acting can make a movie practically unwatchable, and it’s also the hallmark of most ultra-low-budget movies.
It’s not that most actors aren’t any good. But rather, getting a good performance from an inexperienced actor is tricky.
Fix: You can work with non-actors who tend to give more natural performances if they know the world.
For example, if you make a movie about a fireman, you might cast a non-actor who actually is a fireman. You can also take some time to learn how to give direction to actors. Typically the best way to get a better performance from an actor is to help them connect to what their character wants. Focus them on their character’s motivation. And push them into the deep end of an emotion.
Whatever you do, don’t give your actors line readings, i.e. tell them HOW you want a line to sound.
Finally, you don’t need to worry about bad acting when you make a documentary!
8. Wooden dialogue.
Unnatural or wooden dialogue occurs for two main reasons.
First, the dialogue might just be badly written. Second, the actors might be speaking their lines with no intention, which will make anything sound wooden.
Fix: Go through the script and read all the dialogue. How does it feel when you speak it?
Get rid of unnecessary words and lines. Replace lines that are cliche or clunky with simpler dialogue. Listen to how people talk in the “real” world. Listen for the rhythm of people’s speech.
And if the problem is the delivery, get your actors to focus on what their character wants, and the delivery will take care of itself.
9. Hair is wrong for the character or the period.
The most difficult part of period pieces is getting the hair to look right.
But hair is a difficult part of any movie, and it can’t be ignored. Whether you’re making a documentary or a narrative film, almost every shot will include human hair on somebody’s head. And if this hair is either distracting or a total character mismatch, it will take your audience out of the film.
Fix: Always bring hair spray so that, if necessary, you can flatten distracting hairs and keep the style in place.
Also, consider shooting mediums rather than medium close-ups for your interview. Hair issues are less glaring in a medium or long shot than in a close-up. For narrative films, make sure you choose a hairstyle that fits the period and the character, don’t leave it up to chance.
Finally, choose a hairstyle that’s easy for continuity, i.e. one that will stay in place and not mess up your edit.
10. No style.
Often low-budget films feel generic.
Usually, this is because nobody has thought about how they want the film to look. But think of the difference between a sumptuous Baz Luhrmann film and a cozy yet low-key lux Nancy Meyers rom com.
Or consider a Guillermo del Torro film versus a Christopher Nolan film, and how they evoke mood and create a cohesive world with their unique styles. Think about Hitchcock, Tarantino, Scorcese and Speilberg.
They all have a signature style that works with the genre of movies they make.
Fix: The easiest way to start thinking about the style of your imagery is by coming up with a colour palette.
Decide which colours will provide the foundation for the imagery. Then decide if you want your piece to be bright or dark and high contrast or low contrast.
11. Distracting colours and objects in the background.
When shooting fast and loose, it’s easy to miss distracting things in the background.
You’re filming a soft romantic scene, but a red fire hydrant is in the background. Or you accidentally shoot an entire scene with a naked electrical plug in the corner.
Fix: Many of these errors can be fixed in post.
You can desaturate the background, and you can remove an electrical plug. But if you’re new to editing, I don’t recommend relying on post. This will make your life hell and kill a lot of the fun.
Make it a practice to scan every single background of every single thing that you shoot.
12. Continuity blunders.
A major part of filmmaking is simply trying to achieve the appearance of continuity.
You’re trying to get it to appear that you’re filming in continuous time and space even though you’re doing nothing of the sort.
The biggest continuity blunders that make low-budget movies look cheap are related to props.
If you haven’t spent much time working with props or with actors using props, it’s easy to mess this up. When you’re editing a scene together that has hand-held objects, you need their placement in the actors’ hands and space to match up from shot to shot. So if your actor keeps changing how they use the props, you will be screwed in the edit.
Also, if you decide to cut out half the scene, your props won’t match up.
For example, you shoot a restaurant scene and during the edit cut out the middle section because it’s lagging. The problem is that the first half of the scene has a milkshake on the table and the second half has fries on the table. I’ve actually seen this exact mistake in a movie.
Fix: Alway, always rehearse your props in advance and make sure your actor repeats how they use their props from one set up to the next.
No, they do not get to improvise their prop usage. Unless you’re only shooting a single wide shot and no other coverage, improved prop handling is a problem. Your actors can get out their need to improvise in the rehearsal stage, and then together, you can nail down the final staging.
Finally, if possible, avoid food and avoid liquids in transparent vessels.
Most inexperienced actors are not going to be able to maintain continuity with these props. If you have to use food or liquids in clear vessels, bring in an assistant whose main job is to help with the continuity of these props from shot to shot.
13. Mic fails force you to do weird-sounding ADR.
I recently watched a Guy Ritchie film that had some truly horrifying ADR off the top.
Two guys were in a van bantering, but the dialogue sounded wooden. The problem was twofold. First, the dialogue wasn’t well written. Second, they’d had to record the audio after the fact, i.e. do ADR. Automatic Dialogue Replacement, where you record audio in a studio and then try to stick it into your film and hope for the best, almost always sounds fake.
For inexperienced actors, it’s challenging to do dialogue inside a recording studio and make it sound natural. You’re not moving as you would in real life and don’t have any visual cues.
Fix: My experience has indicated that the biggest cause of mic problems on a low-budget production is interference or clothing rustle when using lav mics.
Most low-budget films need to use lav mics because getting a pro boom operator is out of the question. You can get good audio with a lav, but you must set it up properly. Don’t put your actors in synthetic fabrics because the rustle of this cloth will destroy your audio. A tracksuit combined with a lav mic is a recipe for ADR.
Practice setting up your lav mics so that they are placed on or near the center of the actor’s chest and are hidden but aren’t picking up any noise.
And always do multiple takes, even if you nail it on the first take. You’re doing this for the audio more than anything else.
14. Not enough natural sound.
Doing sound design is brutal.
I’m not going to pretend it’s easy because it’s not. But one thing that makes it extra hard is when you don’t have access to the sounds you need and have to either hunt the internet for the perfect sounds or start recording the sound effects yourself.
When your film doesn’t have enough natural sound layered in, then it sounds flat and fake. Your sound design creates a sonic envelope that wraps your viewer in the world of your story. It’s critical.
Fix: Go through your script and make a list of all the sounds that you’re going to need to create the right feeling.
Make sure you list every mandatory sound, i.e. the sounds built into the scenes. For example, if you’re shooting a scene with an alarm clock, that sound is mandatory. Or if you’re shooting a wide shot of two people sneaking through a metal fence, the sound of the metal fence moving is mandatory.
Once you’ve got the list of sounds you’ll need, make a note of all the sounds you can actually grab on shoot day.
If you’re already filming the actors breaking through the fence in a wide shot, just go in and grab the sounds of the fence after you finish shooting that scene.
15. No music or the wrong music.
Music is a massive part of pulling emotion out of your audience.
Imagine Lord of the Rings without the music. That’s just crazy talk! But think of any movie you love, and try to recall the soundtrack or general feel created by the music. It’s a rare and ballsy film that doesn’t have music.
Fix: Start thinking about music before you’ve even hit record.
What kind of music will bring your story to life? What’s the soundtrack inside your hero’s head? Then start brainstorming where you can find this music.
- Listen to indie musicians on Bandcamp and Soundcloud.
- Reach out to any musicians you know and let them know what you’re looking for to see if they’d be willing to donate their music or if they can suggest anyone they know.
- Check out the two cheapest places to find music for your films online: Epidemic Sound and Artlist.
- Search these two platforms for sounds that will create the feeling you want.
This is a big topic, and we’ll discuss it further inside the Zero Budget Solo Filmmaking Workshop.
16. Lacks authenticity.
You might not like this one—and I get it.
But this problem is true for all storytelling. It’s practically impossible to tell stories that we don’t understand on a deep level. So one of the most glaring issues we see in low-budget movies is set ups or scenes that don’t feel real. This is particularly common with crime dramas.
If you haven’t spent a lot of time rubbing shoulders with criminals, creating a crime drama that feels authentic is awfully difficult. And to make a stylized heist comedy takes a lot of money.
The Fix: Make your low and no-budget movies about worlds that you understand intimately.
Specificity comes from understanding a world deeply. And specificity is what creates authenticity.
Why was Good Will Hunting such a massive breakout hit for the infamous Affleck and Damon duo? Because it was authentic. They wrote a movie about a world that they knew intimately. If you’re doing a documentary, you don’t need to worry about this. The world is already authentic!
But if you’re writing and shooting a narrative film, choose a time, place, and set of characters you know almost as well as you know yourself.
17. Sketchy titles!
We’re ending on a funny one that’s relatively easy to fix.
Most people getting started with filmmaking aren’t pro graphic designers. So while they can pull together a clean edit, the graphic design elements can feel very odd. The text is too big, or too small, or the font is just wrong.
The Fix: Keep your titles ultra simple.
Lay the titles on top of the footage rather than doing something stylized. Just use simple fade-in and fade-out effects for the titles. Or, don’t have titles until the end and do it all over a black background.
Spend an entire day (or two) getting the titles’ timing, spacing, and size right. Finally, get a graphic designer to give you feedback on your titles if possible.
Weird-looking titles are distracting, so getting this right is essential.
These mistakes are totally preventable!
And you don’t need a million-dollar budget to get this stuff right.
Yes, I’ll admit that sound design and music selection are tricky. And having a lot of money makes getting these two things right easier. But you can still have solid sound and good music with no budget. You just have to do your planning and be scrappy!
So, are you excited about making your next film yet?
I friggin’ love to help people who have filmmaking dreams. Thinking through production problems and coming up with solutions is one of my favourite things. That’s why I’ve included two Office Hours sessions with the upcoming Zero Budget Filmmaking Workshop.
You can join the Zero Budget Solo Filmmaking workshop in January or watch the replay. Or you can simply engage with the material via the pre-recorded lessons.
Then, you can join two Office Hours sessions in February to ask any follow-up questions or just get some help with your production.
During the workshop itself, we’ll be figuring out what’s your best next story to tell and how to tell it. And we’ll come up with a workable production plan.
You’ll be able to take action and start your next production after going through this workshop!
So, if you’re pumped about making a zero-budget or ultra-low-budget movie in 2023, then hop over here and join me.
Whether you have tons of crew-based experience or you’re totally new to filmmaking, this workshop will help you create a workable plan and get you moving toward making that next film.
My goal for you: start and finish your next (or first) film in 2023!
Read On! More Filmmaking Articles You’ll Love:
🎥 Filmmaking Basics Every Beginner Needs to Know
🎥 Cinematic Lighting: Epic Film Lighting Guide for Beginners
🎥 iPhone Filmmaking Tips for Beginners
🎥 How to Get Started with Filmmaking

About the Author
Hi! I’m Colette Nichol. I’m a solo filmmaker and story strategist based out of rainy Vancouver, Canada. I’ve been making videos and micro films for small businesses and global brands since 2014.
Plus, I LOVE to help aspiring filmmakers pursue their dreams and start making films. This blog is designed to help you gain the knowledge you need to become a filmmaker.
If you want more, get on the waitlist for the Story Envelope Academy Solo Filmmaking Mentorship Program. It opens up one time per year and is the best way to become a filmmaking or video pro fast!
CLICK HERE to get on the solo filmmaking mentorship waitlist.
")