
Written by Colette Nichol, Story Strategist and Solo Filmmaker
Learn the Film Lighting Basics First, Then Go Crazy with Pro Gear
If you don’t know film lighting basics, it’s easy to feel like you’re drowning in the shallow end of an Olympic pool.
Your footage doesn’t look quite right, but when you try to figure out what lights to buy or rent, you’re lost.
There are so many lighting choices.
- Should you use LEDs or tungsten lights?
- Soft lights or hard lights?
- Do you need a reflector?
- What about flags?
- Should you be using a soft box or do you need something with barn doors?
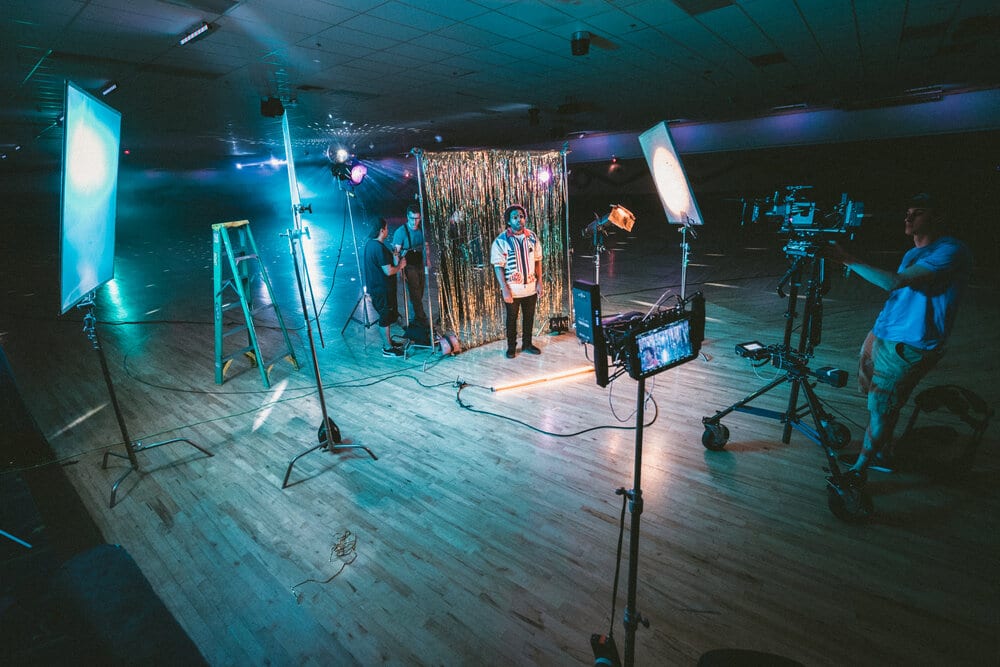
You might look up lighting techniques and see images with 17 huge lights and an entire film crew.
If you’re just shooting a short film or doing a solo filmmaking project, then many of the film lighting tips you’ll find online are useless.
You probably don’t have the budget to buy or rent 3 HMIs. So what do you do if you want to get good at cinematic lighting but you’re just starting out? Learn the basics, and get started!
If you know the basics of cinematic lighting or any film lighting techniques, you can make imagery that is much more evocative, tells a story, punches above its budget, and that you’re proud of sharing! When you’re learning how to become a filmmaker, learning lighting is often last on the list of things to do. But it can take your imagery from basic to beautiful! So it’s worth your time.
So let’s break down the real film lighting basics.
Just a warning: this article is long.
But you do need to know every single thing in it. So grab a boiling hot coffee, and snuggle up with your laptop. (Or just bookmark this page and come back to it in future.)
Table of Contents:
1. Colour temperature and white balance
3. Soft light for film v.s. hard light
6. Shooting outside with natural light
1. Color Temperature and White Balance
When it comes to film lighting basics, these two things are critical.
Have you ever looked back at a photograph or video clip and wondered why the hell it seemed so blue?
Or orange?
Or green?
If you don’t understand colour temperature and white balance you can end up being convinced that your camera turns everything orange.
I actually did meet someone who stopped using their camera completely – declaring it to be garbage – because they thought it was turning their shots orange.
Let’s dispel some myths.
Your camera will not TURN your shots orange. That’s a user error. So what’s the problem? Your camera isn’t that smart. It needs help. But as long as you tell the camera what White looks like, it can figure everything else out.
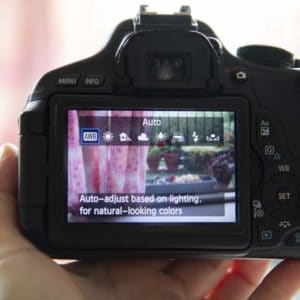
Automatic White Balance
You might have seen the acronym AWB (automatic white balance) on your camera’s LCD screen at some point.
Or you’ve seen those little icons of light bulbs and sunshine and clouds. If you switch through them, selecting different options, you’ll see how it changes the colour composition of your image.
The point of those setting options is so you can tell the camera what kind of lighting is being used in the scene. That way your camera can adjust correctly and give you images that look true to life.
If you simply select AWB on your camera’s settings, this can get you roughly in the right spot. But, if you’re dealing with mixed light, that won’t work. That’s why knowing about colour temperature and white balance is so important. If you understand what you’re dealing with then correcting errors is much easier.
While there are benefits to warming up or cooling down an image, you want that to be a choice you make in your colour grade. When filming, you want to make sure that any white objects do not have an extreme colour cast.
Set Your White Balance
You can set your white balance by using one of the White Balance Presets in your camera which sets the colour temperature of the scene.
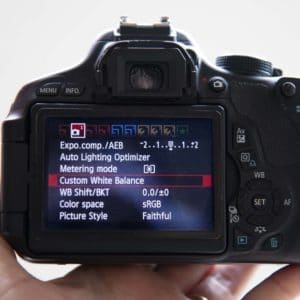
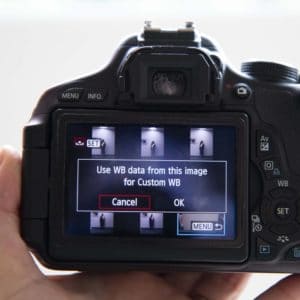
Or you can tell your camera what white looks like by doing a manual white balance, and it will then figure out the colour temperature for you. When doing a manual white balance with a DSLR or Mirrorless camera you usually take a photograph of a white object in your current setting. Then you tell the camera to use that photograph for the white balance. It calculates the right settings by using the white object in the image.
In other words, you’ve told the camera what white is and it adjusts the colour temperature accordingly.
Finally, you can manually set your white balance by telling the camera the degrees kelvin of the scene.
Option 1: Use the presets to set your white balance.
Option 2: Use AWB to do it automatically.
Option 3: Set white balance manually by using a white card or object as reference.
Option 4: Set the white balance manually by telling your camera the colour temperature of the scene in degrees kelvin. (This is what I do.)
Survival Knowledge: Tell your camera what the lighting conditions are or what pure white looks like to prevent incorrect colour.
Know Your Colour Temperature
Think of light as existing on a scale of warm toned to cool toned.
When we talk about colour temperature think of the tone of the light rather than whether the lighting is hot or cold to touch.

The way we measure the temperature of light is in degrees kelvin. Essentially what we’re talking about is measuring the thermal electromagnetic radiation of light.
But you don’t really need to worry about that. What you need to know is that not all light has the same temperature. Thus, not all lighting has the same colour.
That’s why messing up your footage is so easy.
In order to use your camera settings properly you need to know how light is measured in degrees kelvin.
Breakdown of Color Temperature
Knowing your colour temperature is one of the film lighting basic you can’t do without.
Measured in Degrees Kelvin
1700 K – Match Flame
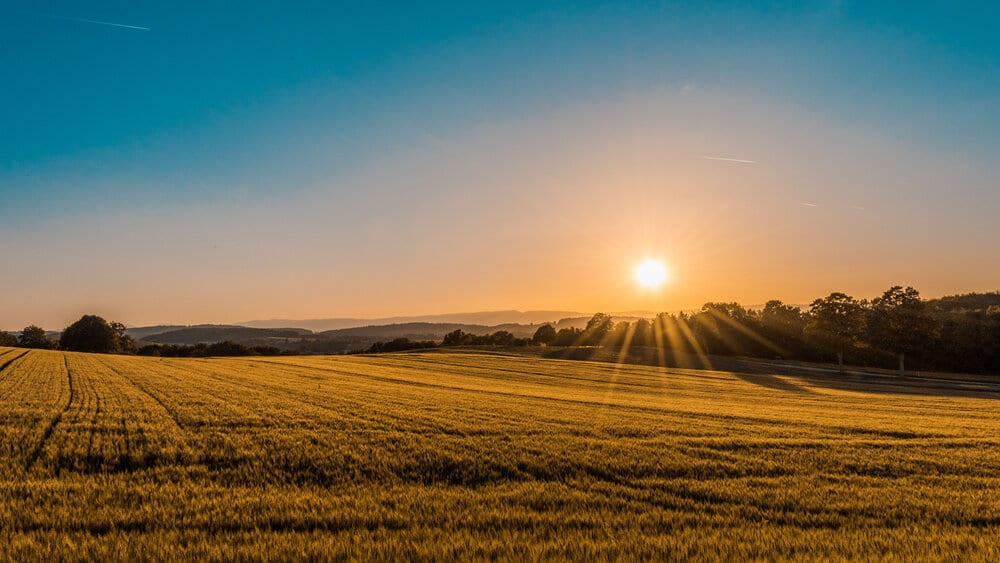
1850 K – Candle Flame, Sunset, Sunrise
2400 K – Incandescent Lamps
2700 K – Household Fluorescents and LED Bulbs labelled as “soft white”
3200 K – Tungsten Halogen Studio lamps (FYI these are actually super hot)
5000 K – Horizon Daylight, Daylight-balanced Studio Fluorescents and LEDs, HMIs
5500 K – Vertical Daylight
6500 K – Overcast Daylight
8000 K – Bright Daylight
These are just approximations. And as you begin to get comfortable manually setting the colour temperature of a scene before shooting, you’ll start to get a sense of exactly how variable colour temperature is.
When you tell a camera the colour temperature of your lighting, you’re telling the camera whether the scene is lit with warm light or cool light.
The unit of measurement for colour temperature is the Kelvin.
This is what Wikipedia has to say:
“The Kelvin scale is an absolute thermodynamic temperature scale using as its null point absolute zero, the temperature at which all thermal motion ceases in the classical description of thermodynamics.”
Getting Colour Temperature Wrong
Okay, so what happens if you go outside on a clear day, and then you tell your camera that you’re shooting in warm light?
It will adjust accordingly and will turn everything orange.
It’s okay to use the AWB (automatic white balance) feature on the camera. Just test out some of the other options first. And if your camera lets you set the degrees Kelvin of the scene, do so! Test it out and see how it looks.
And once you’ve practiced with that, try using a white card to balance your scene. Not going to lie to you, I almost never do this, but it’s a fun 15-minute experiment.
Examples of Colour Temperature Off
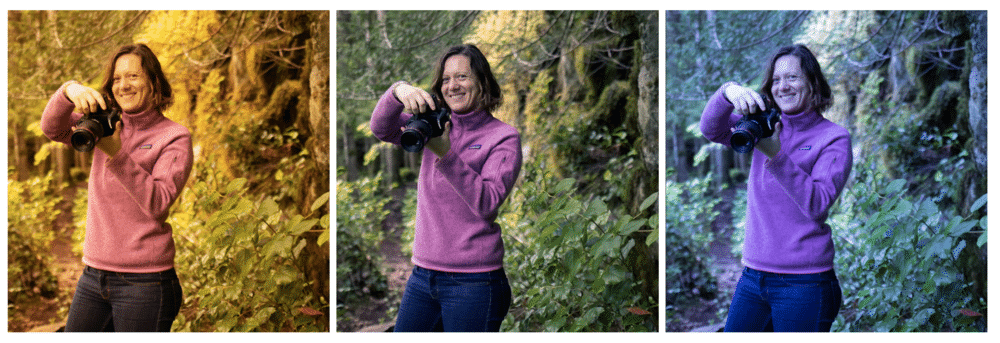
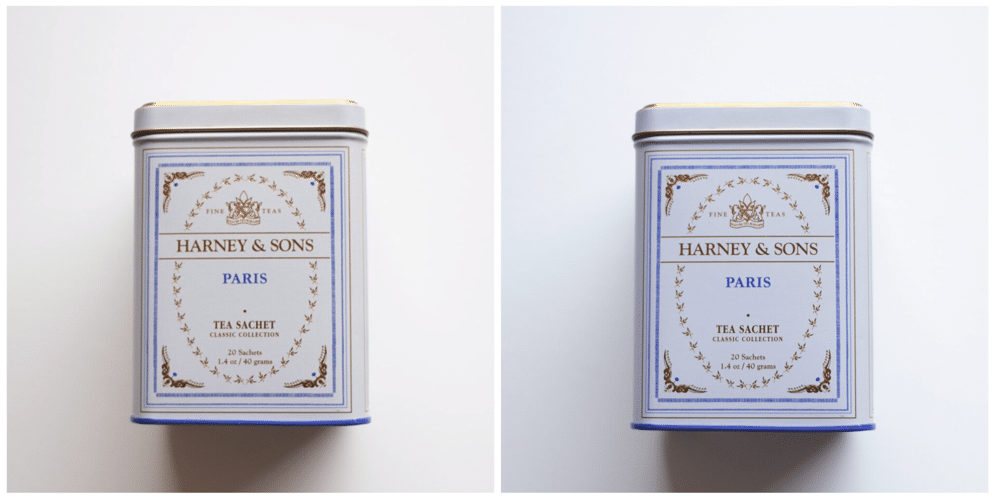
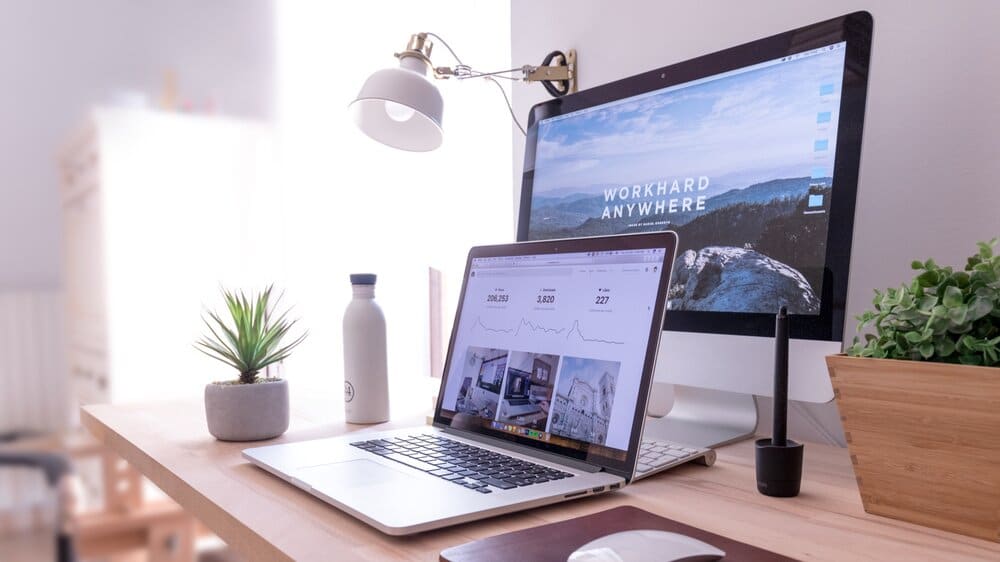
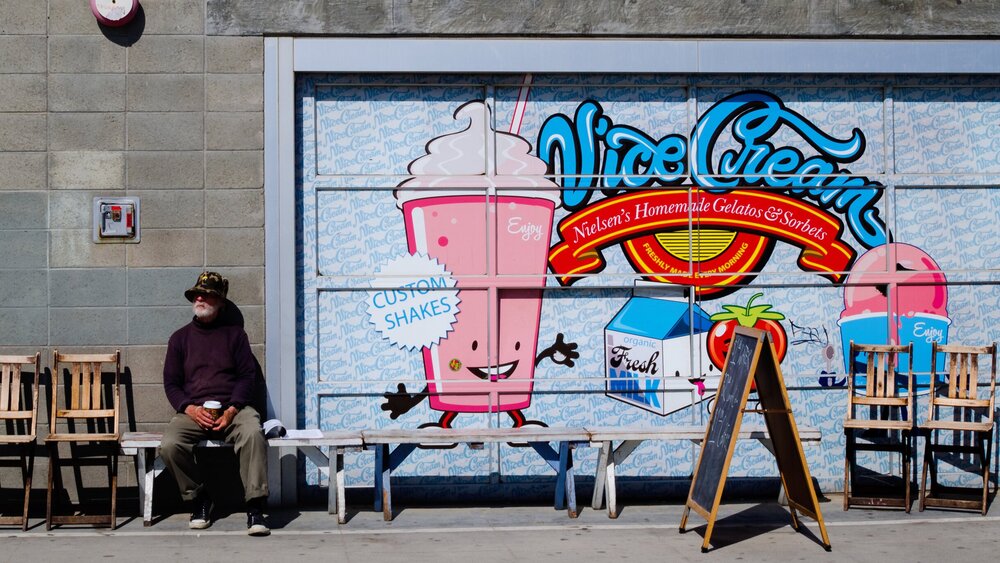
White Balance Examples
In the images below can you see how a difference in white balance will totally change the overall colour cast of the image?
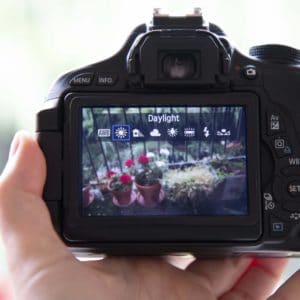
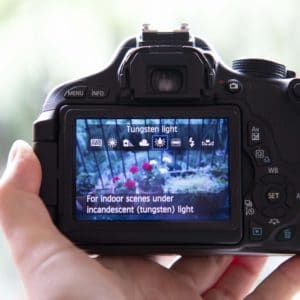
Setting White Balance In Camera
Check out these reference images to see how you can set your white balance in-camera.

2. Dealing with Mixed Light
This is where things get tricky, and people start wanting to toss their cameras into the nearest garbage can.
Good old mixed light knows how to mess with people’s minds.
You know that terrifying hike you were convinced to go on one time. Everything was fine and dandy until suddenly you found yourself on a narrow path with a sharp cliff just inches away.
You’re faced with two options: keep going and know that you’re going to have to go along this death walk on the return trip, or turn around and go home.
Mixed-light can be a nightmare.
It sends more than a few creators into despair. But it’s not that hard to deal with as long as you know what you’re doing.
Here’s the rule of thumb, set your white balance based on the light that is hitting your subject’s face.
That’s it. Simple.
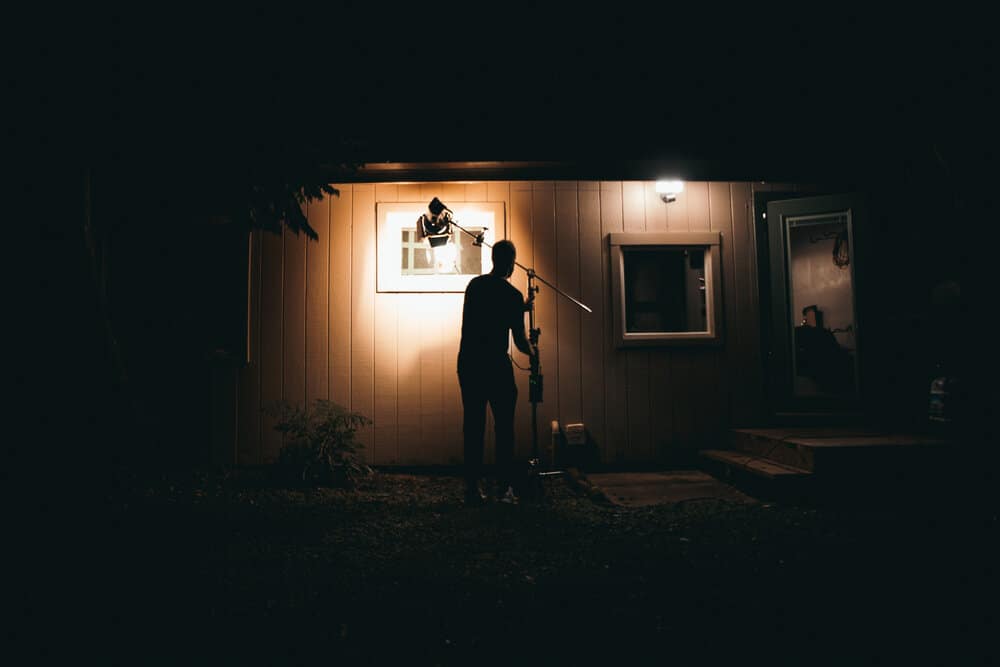
If your subject is lit with tungsten bulbs, but there’s a small window behind her with natural light…not to worry, set WB for 2800 K. You’ll have a slight blue tone in the back window, but her face will be set correctly.
If you have plenty of time and a bit of money you can do things like put up colour gels on your windows or switch out all the bulbs in your subjects house.
I don’t do that because having a slightly cool feeling coming from a window doesn’t bother me.
And if I need a more “natural” look, then I bring in my own lights which are colour balanced to match natural light, i.e. 5600 K.
I turn off all the overhead lights in the space and just use my portable studio lights that are daylight balance.
Since you’re starting out and probably don’t own professional lights, use your white balance settings to make sure you aren’t turning your subjects blue or orange.
Once you are ready to buy lights, make sure you get lights that either give you a colour temperature scale or are 5000 to 5500 K.
One final note: you can’t use AWB (automatic white balance) when you’re dealing with mixed light. It’s not going to give you optimal results, and you’ll have to colour correct after the fact, which for compressed video footage is a bad idea. You want the colour to be coming out of your camera very very close to how it will be in the final edit.
So if you’ve got mixed light, make sure you choose your white balance settings manually.
Survival Knowledge: what matters most is choosing how you want the colour to be balanced on your subject’s face.
Mixed Lighting Cheat Sheet
1. Identify all the different light sources.
2. Deduce what colour temperature they are (roughly – this doesn’t need to be perfect)
3. Turn off any lights that are going to mix in a way that isn’t visually appealing.
4. Check for mixed light on your subject’s face. Move your subject as needed to avoid mixed light.
5. Switch out bulbs if you need to.
3. Soft Lighting vs Hard Lighting
Soft light and hard light are like the difference between soft ice cream and a frozen popsicle.
They create a different feeling on screen.
Ice cream is soft and delicious – just like diffuse light. Think of bright afternoon sun versus the diffuse light of a cloudy sky.
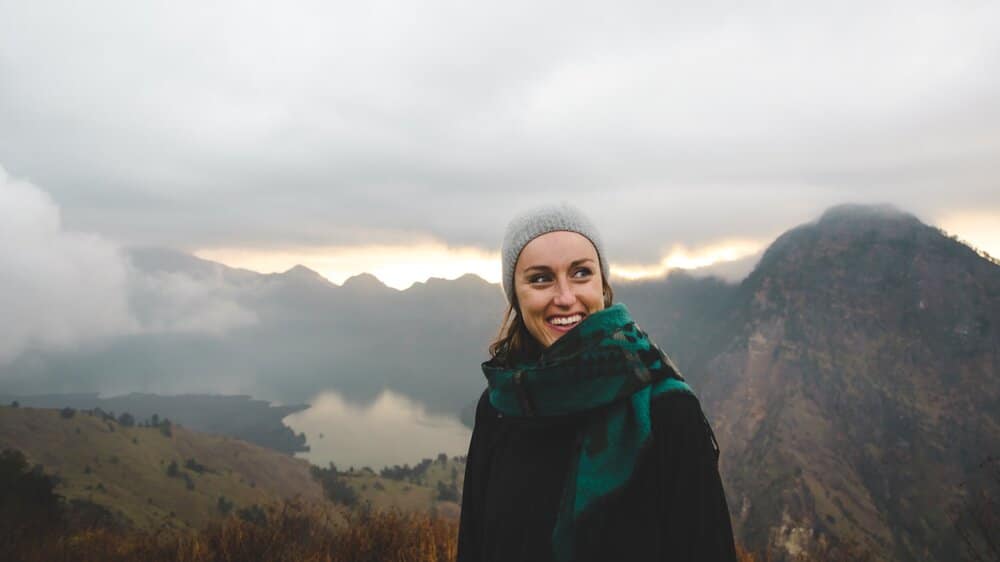
SOFT LIGHT
Soft light means the light wraps your subject gently, not creating too many shadows. It’s a broader more beautifying light.
Think sunset or sunrise. You’re on the beach with your lover, and their skin seems to glow with this beautiful ethereal quality.
Soft light is used for comedies and corporate videos.
Soft light has diffusion.
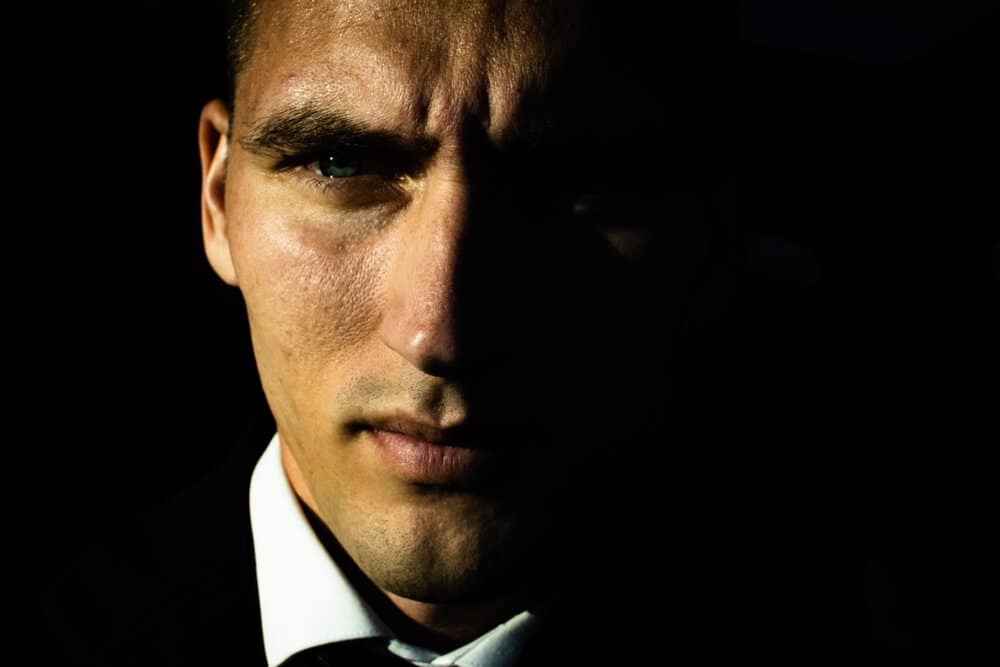
HARD LIGHT
Hard light has sharp edges, strong shadows, lots of contrast.
Think high noon. You’re walking down the street, a sharp shadow following you on the pavement.
Hard light is used for the theatre, for film noir, for dramas.
Of course there’s variation, but in general, that’s how you can think of it for now.
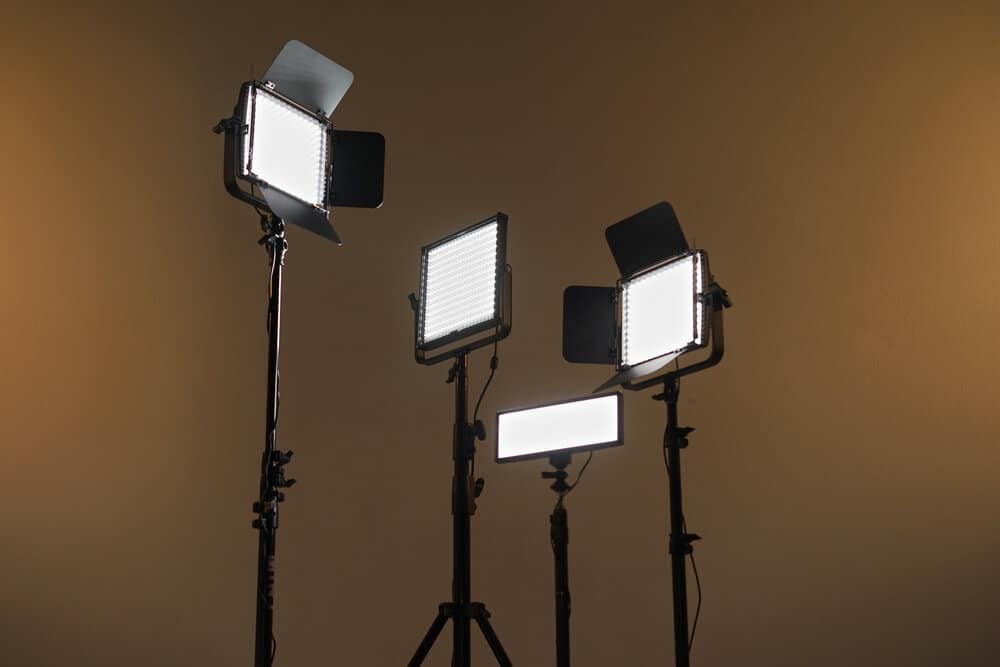
When it comes to using studio lights, you also have soft and hard light.
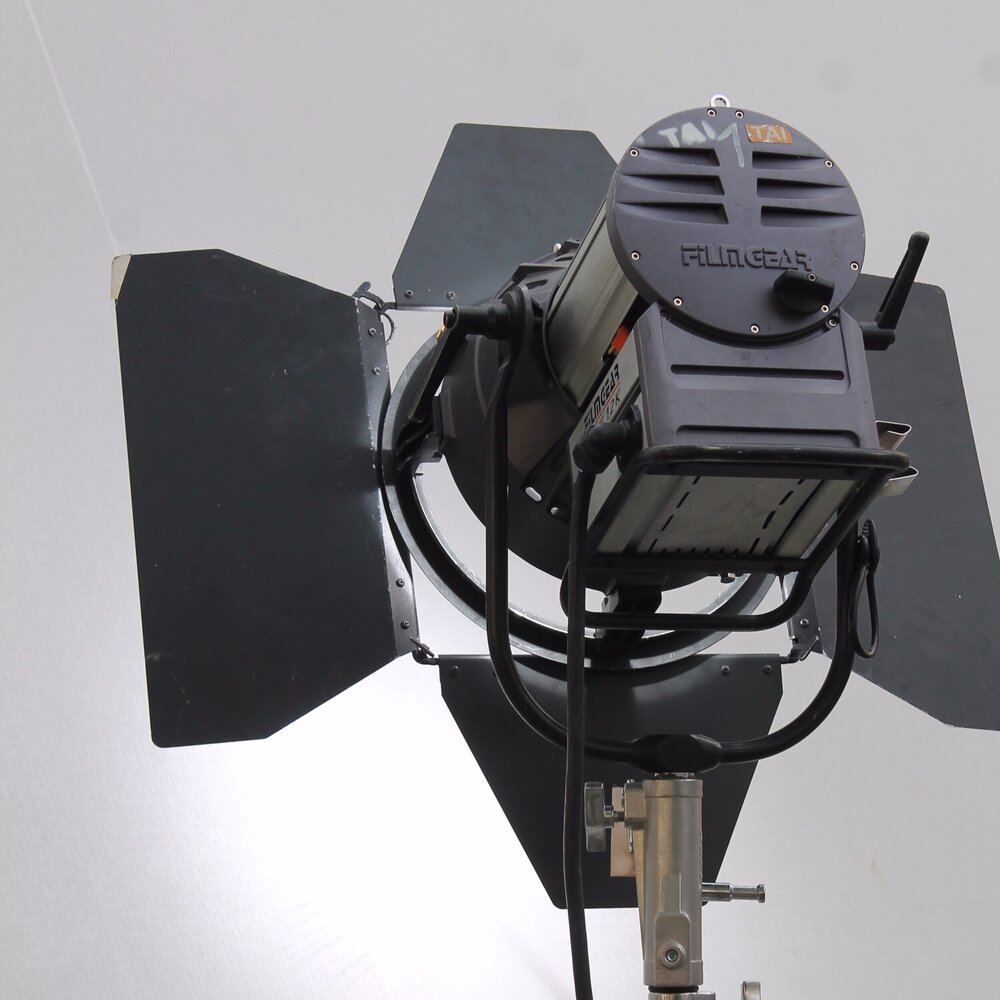
Hard light has a piercing beam that can usually be modified with barn doors.
This light has barn doors to help shape the light.
Survival Knowledge: All light is either hard or soft. Know what kind of light you want before you start filming and adjust accordingly.
PLANNING SOFT OR HARD LIGHT
If you’re shooting a corporate interview, you’re going to want soft light.
So you won’t rent anything that has barn doors. A light with barn doors usually indicates it has a lens and is a hard light source. Instead you’ll choose a light with a soft box or LED panels that can be diffused.
If you want half of your subject’s face to be in the shadows, then you’re going to need that hard light source with barn doors.
If you’re outside and you want the light to be softer, but it’s high noon, then you need to seek shade under a tree or the awning of a building.
But if you’re outside and you want an ultra contrasting look, you can use that hard light of mid-day to carve out the features of your subject. (Just make sure they’re not squinting into the sun!)
4. Shadow Whispering
Unwanted shadows can ruin an entire shot.
But sometimes you don’t notice that they’re in your shot until it’s too late, i.e. you’re editing your footage, and suddenly you see this horrible shadow across your subject’s face.
Some of the most common terrible shadows are those that come from people’s glasses and big hair.
A big hairdo can cast some weird shadows. It can cut the forehead in half or result in strange shadows on the subject’s chest. Glasses if lit poorly can result in shadows below the lenses in the shape of a pair of glasses.
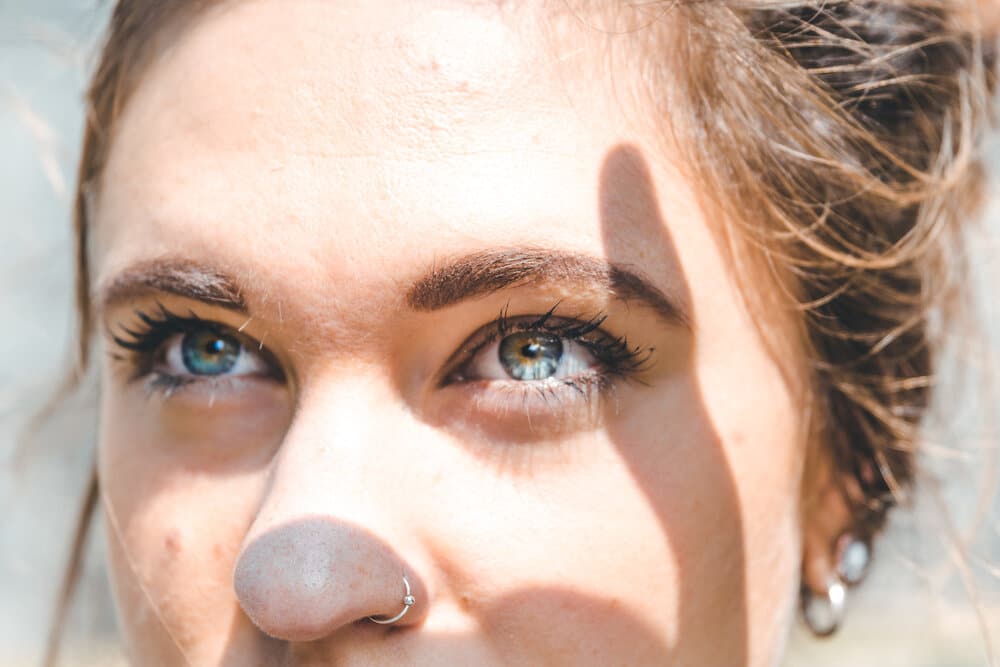
I’ve once seen horrible shadows created by somebody’s insanely long eyelashes. They looked like evil spiders trying to take over this woman’s face.
Survival Knowledge: Checking your shadows is more important than checking your lights.
If all you’re doing is thinking about light, trying to make sure there’s enough light, you’re bound to overlook the ugly shadow that’s marring your beautiful image. And as soon as you start messing with studio lights, you’re going to be in shadow city.
But even with natural light which is softer and more forgiving, you can still end up with shadows that aren’t attractive.
As long as you see a shadow before you press play, you can deal with it. You don’t want to try and fix an unwanted shadow in your edit.
Simply angling or moving your subject or light can be enough to deal with an unwanted shadow. In other cases, you might need to add more light or bring in a reflector to fill in the shadow.
If you think of shadows as cracks that you can fill with light, it will help you deal with them.
Some shadows look great. They create depth, contrast, interest. But other shadows need to be filled in. You get to decide.
5. Bouncing Light
If you throw a bouncy ball against a wall, what happens?
It bounces back towards you. Depending on the angle at which you throw it, it could bounce right back at you or to the side.
But no matter what, it will bounce back.
Imagine that you had a bouncy ball that would only bounce back if the wall was reflective. If it were made of dark materials, the ball would stick to the wall and not go anywhere.
That would be pretty weird for a bouncy ball, but for light rays, that’s exactly how it works.
If light hits a reflective surface (white, light in colour, metallic) then the light will bounce back at the opposing angle.
This white wall could be used to bounce light on the subject. It’s like a gigantic light reflector.
How to Bounce Light
You can use cheap reflectors and naturally occurring elements like white walls or ceilings or curtains to bounce light.
Let me give you some examples:
1. A subject sits next to a huge window (light source) on a sofa.
The window lights one side of their face nicely. But the other side has some shadow you don’t like. Putting a reflector next to the shadow side of the face to bounce the light from the window back onto the subject will fill in those shadows.
2. You’re outside looking for a place to shoot an interview.
You see a huge white wall on the side of the building. The sun is shining from the west hitting the wall at about a 60-degree angle. You place your subject in front of the wall facing away from the sun but not directly behind it and light your subject with the light bouncing off the wall.
3. You’re shooting an interview and only have overhead room lights.
It’s a brightly lit space, but since the light is coming from above, there are shadows under the subject’s eyes. You bring in a reflector and place it at about waist level to bounce some of the overhead light up into the subject’s face. Doing this fills in the area under their eyes.
Key Survival Knowledge: Light can bounce off reflective surfaces and be used to fill in nasty shadows.
When I first started out, the array of lighting options was so overwhelming that I decided to just go for a reflector and stand.
This was a good decision. It taught me how to bounce light, which has come in handy over the years.
Reflectors are cheap. They never break down unless the user is mighty aggressive. They aren’t heavy. And they can teach you A LOT.
Once you do buy a few lights, you’ll still be able to use your reflector in your lighting set up to bounce light or as a way to diffuse light or block light.
If you buy a reflector and stand, make sure you buy a 5-way reflector that gives you white, silver, gold, black, and diffusion. I like the medium-sized round reflectors for starting out. Your reflect can also be used with the black cover on it in order to block light.
6. Shooting Outside with Natural Light
One of the trickiest things about filming outside is that you can often have too much light.
If you’re shooting at noon on a sunny day, you have way more light than you need.
Why is this tricky?
Because unlike in photography where you can just crank your shutter speed up to 1/4000 and easily decrease the light hitting the sensor, in video that’s not an option.
Reminder: The rule for shutter speed in video is that you double your frame rate. If you’re filming at 24 frames per second, then your shutter speed for video is going to be set at 1/50. Max 1/80. If you crank your shutter speed up too high when shooting video, you’re going end up with some weird looking motion. So don’t rely on your shutter speed to deal with bright daylight. Instead use neutral density filters and/or increase the f-stop number.
Prevent Over-exposure
1. You have to set your f-stop number to as high as it will go and your ISO to 100. Which means that your image will be entirely in focus. You won’t be able to get lovely blurry backgrounds with your aperture set to f22.
2. You can use Neutral Density Filters to cut down on the light that enters through the lens. This way you can still use a wide aperture and get a bit of background blur.
3. You can make friends with the shade. If you’re filming an interview outside, that means you get to choose where to place your subject. Look for trees, building awnings and overhangs. Look for doorways. This turns your situation of too much light into just the right amount of light.
Survival Knowledge: When filming outside at mid-day, you’ve got way more light than you need. Use shade, ND filters or a narrow aperture setting.
One more thing you should know about filming outside….
Not all times of day are the same.
You know how your mother used to tell you not to go outside from 11 until 2 pm so you wouldn’t get a sunburn. Well, the sunburn hours apply to filmmaking too. Those hours of the day when the light is brightest are not great for filmmaking unless you have diffusion with you.
Survival Knowledge: If the sun is high up in the sky, your lighting will be harsh.
If you’re booking a shoot with a subject, always take into consideration what’s happening with the sun at that hour.
If you’re inside, then shooting at noon is fine. You’ll get tons of natural light from the windows, but it’ll be diffused. If you’re shooting outside, choose those hours of the day when the sun isn’t directly overhead.
7. What and When to Buy
After months of research and plenty of YouTube induced headaches, I finally settled on which light to buy.
This was back in 2015, when I was first getting serious about filmmaking.
It was a decent light, and I’ve learned A LOT from using it. But boy it was a pain in the butt. So here’s some tips to prevent you from making the mistakes I made.
BEFORE you buy any lighting equipment you need to decide two things:
1. Will you be using it mostly for on-location filming, i.e. going to subjects’ homes/businesses etc.?
2. How much tolerance do you have for doing “complex” setups?
Just knowing the answer to these questions will help you decide what not to buy, which will narrow down, what you should buy.
To be clear, there’s no single correct lighting choice for every filmmaker. There are hundreds of thousands of lighting options.
When should you buy?
Buy a light when you know that you’re committed to doing multiple projects with similar lighting constraints.
You’re past the point of dipping a toe in the water, and you’re committed to doing multi-part series or a range of micro films. As soon as this moment hits, start looking at lights.
Renting is great for one-offs.
But it’s much better to get to know your lights. So eventually you will buy lights if you’re shooting a lot of projects.
When you know your lights well, set up becomes faster and easier. And it means one less step to take before you do a shoot. If you’re always renting lights, then you’re adding an element of difficulty to every shoot you commit to. It also means no spur-of-the-moment stuff.
But if you’re more interested in shooting narrative short films, then you probably shouldn’t buy lights. You’ll need different lights for different scenarios, and renting will be much more cost effective.
Big Bulky Lights or Portables Lights?
If you’ve arrived at that moment of commitment, then you need to go back to these questions:
- Will you be using it mostly for on-location filming, i.e. going to subjects’ homes/businesses etc.?
- Will you mostly be doing on-location cinematic shoots where you have a team and lots of time?
- If you are going to be using it mostly on location, how much tolerance for annoying set-up do you have?
If I don’t have an assistant, then I don’t want to be setting up soft boxes and carrying heavy lights around for a client shoot.
I want high-quality beautiful lighting that is easy to move around and doesn’t intimidate my subjects. But everyone is different. So think about your preferences and pet peeves when buying gear. And don’t get lost in the hype about any gear.
In my opinion, if you’re shooting most things on-location by yourself, then your priority has to be getting lighting that’s light and easy-to-setup.
This means no softboxes. Certainly no umbrellas. If it looks big and bulky, it’s a no. Your priority is to find something high quality, with decent built-in diffusion, and with either a range of colour temperatures or the ability to add gels or filters.
If you’re doing cinematic shoots with a team and tons of time, then money is your only main constraint.
What lighting do you use?
I now use the Westcott Ice Lights II.
They’re awesome. Super easy to set up. Colour temperature is 5500 K. You can buy a tungsten filter in case you’re shooting an interior with no natural light. They’re dimmable, and the put out a decent amount of light. Enough to light a single subject if you also have a little window light.
They cost $400 USD. You can add barn doors if you need to shape the light. Lastly, they are so lightweight and well-sized that I can fit them and the rest of my gear in a small suitcase.
These work for me because I like on-the-go lighting to be featherlight and easy to set up. If I’m working with clients or subjects, I want the lights to be cool and non-intimidating.
For you, as a jumping off point, go onto B&H Photo and look at video lights.
BONUS TIP: Try to get lights that are dimmable. This is surprisingly helpful!
Your priority question is this: will this be annoying to set up? If you hate setting up your lights, you won’t use them!
If you’re shooting everything in a studio and you don’t mind annoying setups, then the world is your oyster, and you can buy whatever you want.
Quality? Does it matter?
When buying lights, most people get stuck on the quality question.
Yes, you should buy good quality lights. Cheap lights give you cheap-looking results.
But even more important is to buy lights that you think will be a joy to use. Buy lights that you will WANT to set up and take down. Buy lights that don’t piss you off.
Survival Knowledge: Only buy lights that you are excited to try and think will be easy/fun to use.
How can you know? Either rent the lights you’re thinking of buying so that you can test them out, or use the am-I-excited test?
If you’re not excited about getting to use the lights, they aren’t the right purchase.
8. What and When to Rent
What if you could get a $5000 look for $40?
That seems like a crazy good deal. Well, it’s what you can do when you rent lights.
When you’re first starting, you probably aren’t willing to invest in lights. So try renting anything and everything that you’re interested in.
There’s one rule, you’ve got to live by when renting though: always, always, rent for two days.
Survival Knowledge: Always rent for 2 days if you’re new to lighting. (And even if you’re not!)
You MUST try out your lights before the day of the shoot.
No excuses.
I don’t care how busy you are – you must set up your lights, and test them before you get anywhere near a subject.
Until you do that, you don’t know how much illumination you can get. You won’t know how to set them up quickly. You won’t know their pitfalls.
You never want shoot day to be the first time you try something – especially not when it comes to lighting.
If you’re a master of preparedness, you’ll rent the lights twice. Once to test them out and take notes. And then again for the big shoot.
Yes, that costs extra. But you’re paying for hands-on education, which is invaluable.
Just a Casual $2000 Light
Holy cow, do I ever want this light. It’s absolutely beautiful. But it costs a cool $2000 USD.
So you can see why you might want to rent instead of buying when lights can cost that much.
Tungsten lights are the cheapest, but they are also not ultra-powerful. And if you need to add blue gels (CTB) to get them to match your daylight, then you lose a few stops of light as well. Fun Fact: tungsten bulbs are better at producing heat than they are at producing light — they’re very very inefficient. But they have a CRI (Color Rendition Index) rating equivalent of 100, so they produce gorgeous true-to-life colours when you’re filming with them.
When should you rent?
Starting out, rent lights as often as you can. The more hands-on time with lighting the better. You can usually get a good deal on lights over the weekend when the corporate shooters aren’t working. So plan something for a Sunday, and test your lights out over the whole weekend.
What to rent?
1. Anything you think might be worth buying.
2. Anything you think would be fun to try out.
How To Take Action
I recommend bookmarking this page and reading it again.
Then ask yourself this one question:
What can I do to improve my lighting skills?
It doesn’t have to be something big.
It could be as low-key as renting a weird light and filming your cat. Okay, that does require some effort.
Or you could coerse your partner or a friend to sit in all the chairs around your entire house and film them, so you can compare how the different types of light affect the final image.
Make something up that interests you.
As long as you’re thinking about light, you’re moving in the right direction!
Learn Filmmaking — Keep Reading:
➩ How To Get (Beautiful!) Blurry Backgrounds For Your Photos and Videos
➩ Filmmaking Techniques for Lighting the Human Face
➩ The Filmmaking Basics Every Beginner Needs to Know
➩ Three Basic Rules of Visual Storytelling for Filmmaking
➩ How I Got Paid to Learn Documentary Filmmaking
➩ The 10 Elements of a Good Story for Filmmaking (and everything else)
➩ The Definitive Guide to Manual Exposure for Photo and Video
➩ Filmmaking Tools: It Might Be You…Or It Might Be Your Tools

About the Author
Hi! I’m Colette Nichol. I’m a solo filmmaker and story strategist based out of rainy Vancouver, Canada. I’ve been making videos and micro films for small businesses and global brands since 2014.
Plus, I LOVE to help aspiring filmmakers pursue their dreams and start making films. This blog is designed to help you gain the knowledge you need to become a filmmaker.
If you want more, get on the waitlist for the Story Envelope Academy Solo Filmmaking Mentorship Program. It opens up one time per year and is the best way to become a filmmaking or video pro fast!
CLICK HERE to get on the solo filmmaking mentorship waitlist.
")