
Filmmaking Basics for Beginners: From Pre-Production to Post
Article by Colette Nichol, Solo Filmmaker, Story Strategist, and SEO
In this article, we’re going to walk through the essential filmmaking basics from start to finish. So grab a cup of coffee, and settle in.
Just need something specific?
Use the table of contents below to find the filmmaking topic you’re looking for. Links are clickable. 🙂
Filmmaking Basics In This Article:
- The Best Part: Intro Story – Don’t Skip This!
- The Three Stages of Filmmaking
- Production
- Storytelling
- The Script & The Storyboard
- Shot Sequences & Camera Shots and Angles
- Shot Sizes
- Pre-Production
- Lens Choices
- Creating a Shot List
- Casting, Crew, Subjects, Locations
- Planning Lighting
- Production Basics
- Production Paperwork
- Cinema Cameras
- DSLR Cameras
- Mirrorless Cameras
- Recording Audio
- Next Steps
The year was 1993.
I was flipping through a Teen Magazine when I saw an article about Drew Barrymore’s production company.
I was 9 years old, and I was floored. If this woman had a production company, so could I. A world of possibility opened up before my naive farm-girl eyes. For a minute.
But then, like most nine-year-olds (and people in general), I tucked that dream in my back pocket and went about my life. I didn’t become a filmmaker by being some young genius, making films and winning awards before I’d hit my not-so-sweet sixteen. Sorry. I’m no prodigy.
You can become a filmmaker at any age.
It wasn’t until my early 20s that I pulled the filmmaking dream out and dusted it off.
But once again, it wasn’t the time. The idea of spending $25,000 or more on film school and graduating with no gear to my name was out of the question.
Dream back in pocket.
Then the digital revolution happened, and I couldn’t stop thinking about cameras. I couldn’t get this image out of my head: a DSLR in my hands. That’s it. But it haunted me.
At the time I thought that getting a camera meant I’d be covering the filmmaking basics.
Well, did I have a lot to learn. Because it turns out that buying a camera (or beg, borrowing or stealing one) is just the beginning.
Filmmaking starts with taking a story and using technology and artistry to bring that story to life in motion on screens that range from the tiny to the gigantic. So aside from understanding the technology, having a skillset, and being able to access the gear, you also need to know about the stages and grammar of filmmaking. Which is what you’re about to learn today.
So let’s get to it!
The Three Basic Stages of Filmmaking
There’s actually more than three stages in the process of filmmaking.
But nobody likes talking about the last stage. It’s the boring business-side that makes most artists want to slink away to a dark hole and stay there. But it’s necessary.
So the four stages of filmmaking are as follows:
- Pre-production
- Production
- Post-production
- Marketing/Distribution.
Pre-production (or Peeling the Banana)
You know how before you eat a banana you have to peel it?
Well, same goes for filmmaking. Before you start the fun/crazy part i.e. shooting, you have to plan the living hell out of your production.
This goes for whether you’re doing a solo shoot or making an epic blockbuster feature film. Doesn’t matter what size of production, you’ve got to nail your pre-production if you expect your shoot to be a success.
Before pre-production starts, you’ll do these three things:
- Come up with a story idea that has a hook and a hero
- If you’re pitching your film, you’ll write a logline and a treatment (no need for this if you’re self-funding or creating a solo project)
- Write the script—or for a solo documentary production you might just flesh out your ideas
During pre-production you’ll do all of the following:
- Build your team (cast/crew/subjects) or decide to do it solo
- Nail down the date for the shoot with your subject, cast, crew
- Find the right location (location scouting might be involved)
- Create a shot list
- Decide how you’re going to distribute your film (online, festivals, other?)
- Decide on how you’re going to promote your film
- Make technical choices based on your distribution plan (frame rate, frame size, camera, lighting, sounds)
- Securing gear rentals, loans, or just prepping your own gear
Production
This is what everybody thinks of when they dream about filmmaking: the shoot days.
This also tends to be the part of a production where your awesome pre-production work or lack of prep rears its head. You can’t fake it during a shoot. Either you’re ready, or you’re not.
During production, you’re either working solo with a subject or with a cast and crew in order to get every single shot you need (the essentials) to tell the story that you intend to tell.
When creating your shot list, you’ll have nice-to-have shots and you’ll have essential shots.
When things go wrong on shoot-day, as they inevitably will, you can slash the shots that aren’t vital and just keep rolling.
The most important thing here, if you’re on a small or zero budget, is to stay on schedule and not require any additional shoot days. You’d be surprised at how easily you can lose cast and crew if you need another shoot day beyond what you’ve planned.
The key to a smooth production process is knocking your pre-production out of the park like you’re Babe Ruth in his prime.
Post-production
This is where you get to say things to yourself like, “Wow, I wish I hadn’t decided to fix it in post!”
It’s very common for people to say, “We’ll fix it in post,” every time something goes wrong on a set. The thing is: sometimes you can’t fix it in post.
We’re talking about the editing process of course. Editing is where you build the story from all the footage and audio you’ve captured on set.
All of the following are included in post-production:
- Editing from rough cut to final cut
- Colour correcting (spelled the Canadian way)
- Colour grading
- Sound design
- Sound mixing
If you’re a solo filmmaker you may do all of these things yourself. It’s not as hard as it sounds, btw!
Marketing
I’ll keep this short because I know you don’t want to hear about this right now.
But the truth is that movies are only successful when they’ve been marketed. The marketing typically begins with pre-production. Typically a Hollywood movie won’t even be made if the producers and marketing team don’t think they can sell it. Same goes for an indie production with a multi-million-dollar budget.
For indie filmmaking or solo filmmaking, you are the marketing team, most likely.
So you might want to consider who your audience is and ask some questions:
- Who wants to learn more about this topic?
- Who wants to watch this story?
- How big is your audience?
- Where do they hang out online and offline?
- How can you tell them about your film once it’s done?
- Are there groups or influencers who might be interested?
Thinking about marketing before you make your film will help you more than you might realize.
In fact, I wouldn’t make recommend making a short film or online film without thinking about your audience. Even if the stakes are low, you’re still investing a lot of time into your production. You should know who your audience is before you start putting in the effort.
As much as we’d love to think that movies sell themselves. They don’t. Nothing does. So marketing, while you might not like the sound of it, is one of the most essential parts of any successful endeavor, creative or otherwise.
Storytelling
The Idea
No film can survive without a good idea at its core.
Some writers and filmmakers would argue that you need more than just a good idea: you need a hook!
The basis for any film idea or hook is this: Subject + Deep Desire + Obstacle(s)
Another way of looking at this is by asking the simple question: Who is this about and what do they want extremely badly?
A film doesn’t work if you don’t have an interesting and sympathetic subject with a deep desire who’s got obstacles in their way.
You can go a lot further with this. I’d recommend reading Save the Cat by Blake Snyder if you’d like to learn more about idea generation and creating a hook for your film. This book is primarily for screenwriters but it’s also interesting for documentary filmmakers and even online solo filmmakers.
If you have a tendency to get stuck when working on scripts, then check out the 14-day storytelling course for writers and directors. It’s designed to help you get back on track, fix story problems and boosting your story confidence, so you’re not so afraid of the blank page.
Documentary vs. Narrative
So what kind of movie do you want to make?
There are two main choices: documentaries or narratives. A documentary is supposed to be an expression of “real” life. But even in a doc, you can do a lot of directing, and it isn’t necessarily just a matter of standing back and filming whatever happens in front of you. Sure, you can do that. But you can also direct the action, set up scenes, and hold staged interviews. You can put yourself in the documentary as many well-known directors do.
Honestly, there aren’t any rules that you have to follow aside from the fact that if you have actors it ain’t a documentary anymore.
Narrative filmmaking uses actors.
You’ve got a script or a story that you’ll improvise, a director, costumes, sets and the whole shebang.
Many filmmakers start out with documentary filmmaking because it’s much less expensive and great subjects and stories are everywhere.
If you want to make an online documentary, you don’t need an investor or a producer. You just need a camera, your sound gear, a subject, and the ability to edit and tell a story.
The Script
This is only strictly necessary if you’re doing a scripted narrative or animated film.
Most animated films have their scripts locked down long before production starts. That’s because it’s insanely expensive, so there’s no such thing as multiple re-shoots if you’re creating a CGI epic.
But with narrative filmmaking you might be doing re-writes on your script all the way up to and including the days of the shoots. You might also be doing an improvised movie, which requires only a storyline and characters and no traditional script.
Some documentary filmmakers do create scripts, while others don’t. Typically, however, most filmmakers (who aren’t working solo) create treatments. This is a 5-15 page breakdown of what the film is about including a longline, synopsis and character breakdowns. It’s usually used to get funding.
If you’re solo filmmaker, you don’t need a treatment.
You do still need to know what you’re making a film about. But there’s nobody you need to convince.

The Storyboard
The storyboard is the part of filmmaking a lot of beginners get tripped up on. You might think you need something elaborate. You’ll need to pull out those felt pens from grade school and learn how to draw realistic humans.
Wrong!
You might not even need much more than a stick-person scrawl in the margins of your script.
For big-budget animation films, storyboarding is essential. Every shot is designed multiple times until perfect.
The same goes for big-budget action films.
If you’re making something on a smaller budget, it’s common to have very simple storyboards.
I’ve done storyboards just made up of photographs of the actors roughly on location, and I’ve also done stick figure scrawls. But, I’ve never done anything elaborate.
What to consider when creating a storyboard:
- Shot Sequences
- Shot Angles
- Shot Sizes
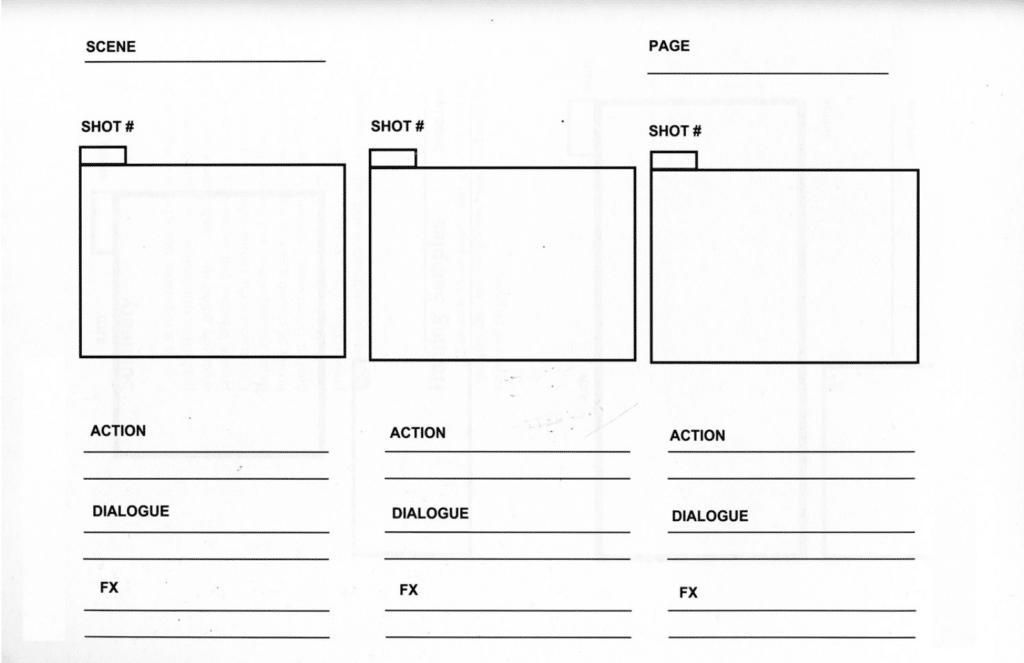
Storyboard Examples
Make your own with Google Docs or click here and use this free one from Wiki Commons. Below you’ll see two examples of blank templates, and one example of a storyboard that’s been filled out. To be sure, you don’t need a storyboard that’s so artfully drawn. A stick drawing will be more than sufficient.
One way to create a storyboard is to actually just do rough photographs of the shots.
Visual Storytelling
Shot Sequences
Each shot in a film must build on the one that came before it.
The goal of your film or video shoot is to get enough footage that will work together in the edit to build a story.
A typical shot sequence for a film might be something like this:
- Establishing Shot (wide)
- Medium 2 Shot (both actors)
- Over the Shoulders Medium Close Up on Actor 1
- Over the Shoulders Medium Close Up on Actor 2.
- Medium 2 shot (both actors)
- Close Up on object in Actor 1’s hand
- Medium Single of Actor 1
—-and so on—-
That’s just a shot sequence you see in TV shows all across the land. It doesn’t mean you have to do that. In fact, plenty of creative filmmakers don’t do that at all. Watch all of Wes Anderson’s movies and you’ll see a much less common way of putting shots together. He relies on the medium two shot for a lot of his dialogue. And he loves the wide shot. The films of the Cohen brothers are also an interesting place to find inspiration when it comes to shot sequences.
Basically, the only ground rule is that your shots have to work together, one after the other.
This is something I teach in my online filmmaking course, and it tends to be the area that solo filmmakers struggle with the most. It’s easy to go out and shoot a bunch of B-roll (i.e. shots that aren’t connected). Whereas shooting shot sequences requires planning and thinking like a filmmaker.
Camera & Shot Angles
Here you’ll want to follow the 30 degree rule.
To cut your shots together later in the edit suite you’ll want to move the camera so that the field of view is 30 degrees different relative to the previous shot and next shot. You do this each time you re-frame. This allows shots to be cut together seamlessly.
If you film your subject straight on in shot, then move the camera so that it’s capturing your subject from the side, that would create more than a 30 degree difference. When cutting these two shots together it would appear relatively seamless.
Personally, I love to jump in without changing the angle (also called a Jump Cut). But it can be hard to match motion/emotion when cutting this way, and it probably shouldn’t be your go-to.
An alternative or addition to this is the 20% rule which states that in order for shots to be cut together in the edit seamlessly, they need to be 20% different from the previous shot. You can change the shot size, camera angle, depth of field, and focal length to create a combine 20% difference.
For example, if you change the focal length of your lens from 80mm to 24mm, going from a close up with blurry background to a medium wide with far more background detail, your shots will likely cut together just fine.
Shot angles for filmmaking include:
- Low – shooting from below (can be a “hero shot” if extreme)
- Eye-level (exactly as it sounds – considered a non-manipulative angle)
- High (shooting from above)
- Worm’s Eye (shooting from extremely low)
- Canted/Dutch (shooting on an angle—very unsettling angle)
- Bird’s Eye View (shooting from directly above)
- POV (shooting as though you are in the shoes of the subject)
One general note is that the different shot angles you use will affect how your viewer feels about the characters on screen. For example, a low shot, looking up at a character makes them come off as powerful. A shot looking down at a character makes them seem vulnerable. So just changing your shot angles willy nilly is not going to create an edit that works even though the shots might be “cuttable.”
Change the camera angles intentionally to help tell the story.
STORY ENVELOPE FILMMAKING LETTER
Get filmmaking tips to your inbox once per week, plus the free Mini Filmmaking Course.
Join 2000+ filmmakers, and get filmmaking tips, lessons, gear tips, stories, and motivation! Also, whenever I write an epic (ultra long and useful) blog post about filmmaking, I’ll send it to you.
Video Break! The Dutch Angle
This video simply shows you the dutch or canted angle in its full glory including the degree at which the camera has been angled. Amazing!
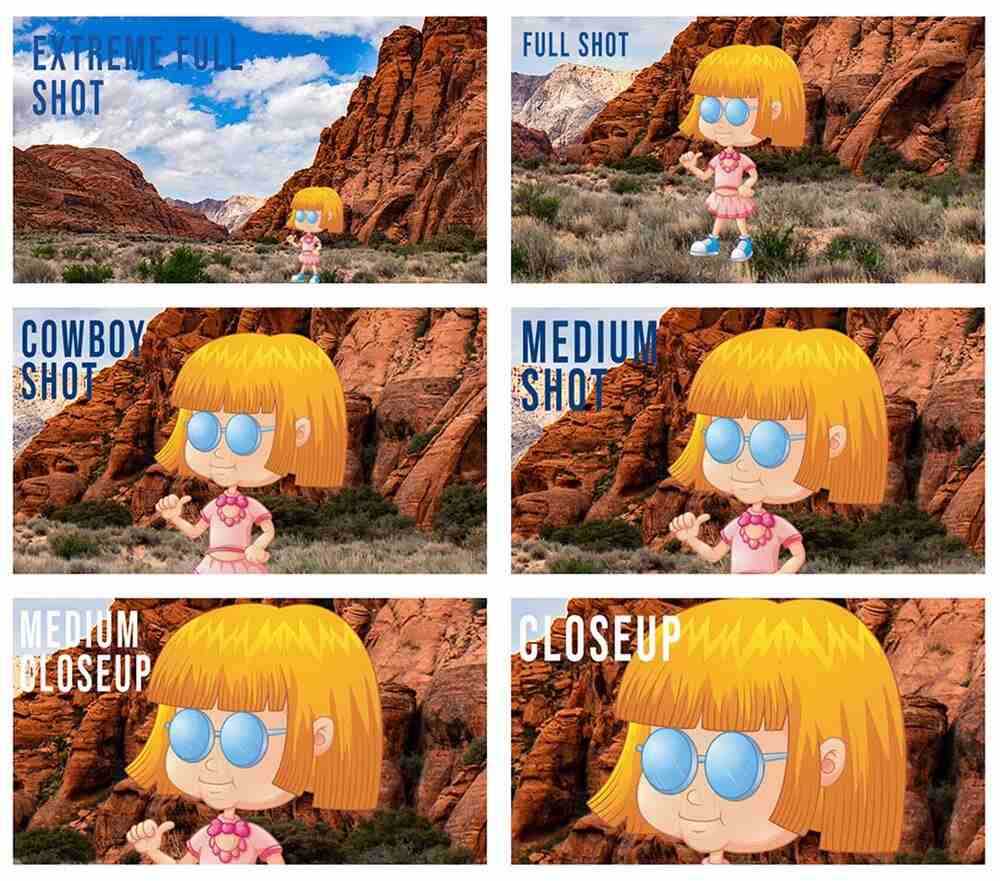
Shot Sizes
When you’re creating a shot list, you want a variety of shot sizes.
Unless you’re making a wonderfully weird art film, it’s unlikely every shot will be the exact same size.
In your arsenal as a filmmaker you’ve got the following:
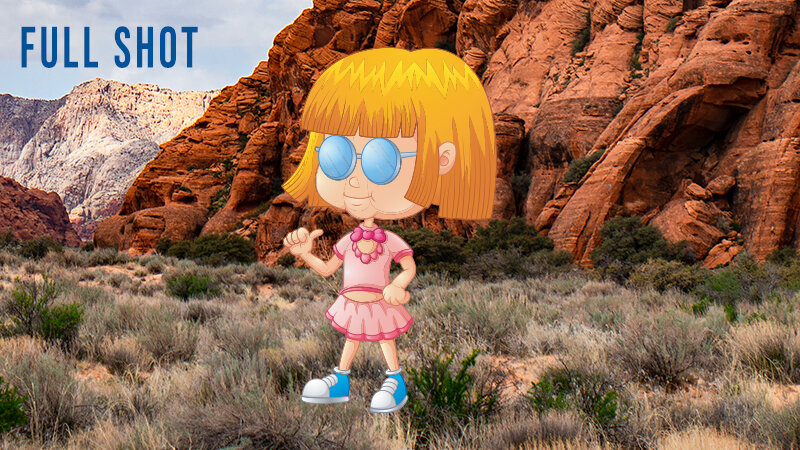
- Extreme Full Shot also called Establishing or Wide Shot or Long Shot
- Full Shot
- Medium Full Shot
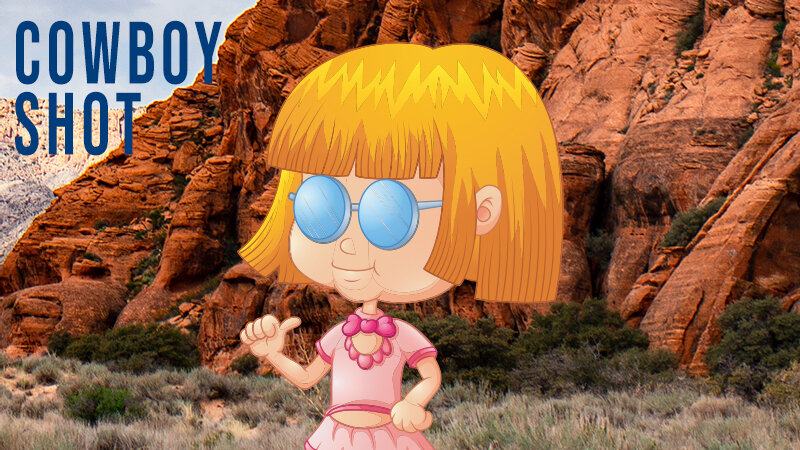
- Cowboy Shot (pretty sure nobody says this anymore…but here it is)
- Medium Shot
- Medium Closeup
- Closeup
- Choker (a subset of the closeup that cuts right at the neck)
- Big Head (a subset of the close up that shows just the head)
- Extreme Closeup


Pre-Production
Pre-Production is the detail-oriented world of high-energy humans.
It’s also the reason most people never make films despite big dreams. While most people say it’s the money that’s preventing them from making a film. The reality is that the pre-production process is what’s usually stopping people, not the lack of funds. What you lack in money, you can make up for in meticulous pre-production.
Pre-production includes every single basic decision that must be made before anyone presses the record button on their cinema cameras.
Pre-production for a big narrative feature film will be different than pre-production for a run-and-gun documentary, which will be different than pre-pro for a solo micro-documentary. While the choices are the same, the number of people and time involved is much different.
Here’s a non-exhaustive list of some decisions and actions you need to take during Pre-production:
- Lens Choice
- Creating a Shot List
- Choosing Your Aspect Ratio
- Choosing the Right Camera
- Going Solo or with a Crew
- Putting Together a Film Crew
- Casting or Finding a Subject
- Finding a Location
- Production Design
- Costume Design or Wardrobe Suggestions
- Planning Your Lighting
- Renting Gear vs Buying Gear
- Where’s It Going to Screen?
Lens Choices
This is a critical yet typically overlooked choice.
While everyone freaks out about what camera they’re going to use when making a short film, it’s less usual to hear about this much more important decision. Unless of course, you make a habit of reading cinematography blogs and magazines.
While your choice of camera will have an effect on the overall quality of the image and how nimble you’re able to be, the lens choices will be what help tell your story. Knowing the best lens for your project is critical.
The first decision you need to make is whether to use prime lenses (fixed focal length lenses) or zoom lenses.
For narrative feature filmmaking, the decision is easy. Use primes. They provide much higher quality. The quality of a lens is usually determined by how sharp the images it captures are, how little the lens distorts the image, how colours are rendered, and how nice the bokeh (background blur and shape of bokeh balls) is.

Do you see all those glowing balls in this image? Those are bokeh balls. They’re created by shining points of light that are out of focus.
Once you’ve decided on whether you’re going to use zooms or primes, you then need to decide on your focal lengths.
Deciding on your focal lengths comes from knowing how you want your film to look. If you’re working with a Director of Photography, you can lean on them for this. They’ll be choosing lenses based on your description of what you’re trying to achieve.
If, however, you’re aiming to become a solo filmmaker, then it’s time for you to learn about lenses.
There are two good ways to get started understanding focal lengths.
- Use a camera with a 50mm or equivalent lens and get know what that looks and feels like. 50mm is considered a standard focal length and one that is most similar to how humans see the world. But some cameras have sensors that crop your lens’s field of view and so you’ll actually need a shorter lens to get the same look. A 50 mm equivalent might mean using a 24mm lens or a 30mm lens on a crop sensor camera.
- Use a camera with a standard zoom lens and play around with all the focal lengths, so you begin to understand the difference between what a 20mm focal length can do for you compared to a 50 mm focal length.
Creating a Shot List
Your shot list is what prevents your shoot from falling apart.
This is where you plan the shots you need to capture, and the order in which you need to capture them. One of the most important parts of creating your shot list is deciding which shots are absolutely essential and which are just would-be-nice or safety shots that you can cut if you’re running out of time.
Even in filming a documentary or micro doc, you’re going to have a shot list. It’s the only way you can be sure that you’re not forgetting some critical element.
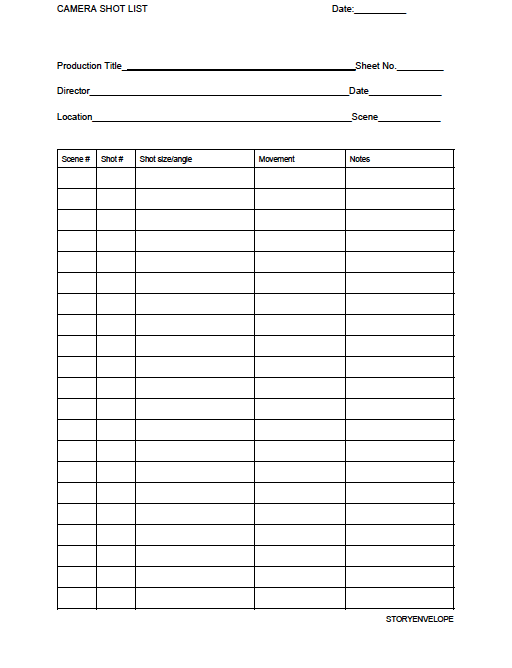
There’s no one perfect way to make a shot list, but here’s what it would often include:
- Shot size (medium, close up, wide…)
- Description of shot including movement within the frame
- Angle of camera/shot
- Camera movement
On a more elaborate shoot where your shot list isn’t just for your own reference, but also to communicate with your crew, you’d probably also include:
- Camera and Lens for the shot
- Frame rate
- Location
- Sound/Dialogue notes
- Actors
Super Simple Shot List
You can download the pdf of this Super Simple Shot List by clicking here. You don’t even have to subscribe, I’m just giving it away. Also, you can easily make one that fits your needs using Google Docs and it’s insert table function.
Choosing Your Aspect Ratio
In some cases there is no choice. You have to shoot in the standard aspect ratio for the medium.
In other cases this might be a big decision.
The aspect ratio of your film refers to the frame size at which you present your footage. This might not be the same as the aspect ratio at which you shoot your footage.
Most TV shows have an aspect ratio of 16:9. If you turn this into a ratio over 1, you’ve got an aspect ratio of 1.7 to 1. Most people just call it 1.7
This coincides with basic HD footage which is 1920×1080 which is the same as 1.7
For movies on the big screen, the studios usually go wide (1.85) or ultra wide (2.39).
Aspect Ratio Comparison
Aspect Ratio: 4:3 — also called 1.33
Aspect Ratio: 2.39
Film Production Basics Nitty Gritty
Choosing the Right Camera
This is where most indie filmmakers start pulling their hair out.
It doesn’t have to be such a complex decision, however. If you have no money, use the camera your director of photography has access to or the one they want to rent.
If you’re aiming to become a solo filmmaker and you need to buy a camera, then it’s time to start listing out all the ways you want to shoot. There are no perfect cameras that work perfectly for every single type of shoot. You need to know what rigors your work will be putting you through, and from there you choose a camera that will help the work get done most efficiently.
If you’re planning on directing and film, and you’re not interested in becoming a solo filmmaker, then don’t spend money buying a camera.
Going Solo or With a Crew
If you’ve read this far, then clearly you’re legitimately interested in making films.
Well, just so you know, you can start small and solo. You don’t have to jump in right away with a crew.
You can put together a filmmaking kit with a camera, lens, sound gear, and go make a film solo. This works best for documentary-style micro-filmmaking. But you could pull it off on narrative work if you were doing something hyper minimal.
If you’re interested in making narrative short films or narrative features, then, you’re going to need a crew.
At a minimum, you’ll need a Director of Photography (DP), Sound Recordist/Mixer (usually they like to work with a Boom Operator who is the person who expertly handles the microphone on the boom pole), Line Producer, and it helps to have an Assistant Director (AD) otherwise your Producer is going to be doing double duty. I’m assuming, you’d be the Director in this case.
This is your bare minimum. Remember that for every day-long shoot, you’ve got to feed your crew and make sure everything runs smoothly. So you’ll usually need a bit more than the minimum. The more professional everyone is the more you can get away with a skeleton crew.
And while you certainly don’t need a huge crew for every production. The fewer people you have, the longer it typically takes to get things done.
In this regard, solo filmmaking is incredibly liberating. You don’t need all those people to get it done. But you do need a light-weight kit, some production know-how, and a highly specific strategy.
Putting Together a Film Crew
You’ll need a strong cup of coffee and persistence, especially if you’re starting from next to zero and don’t have much money to spend.
It helps to set a shoot date before you start seeking out a crew because it’s hard to get a firm yes if you can’t tell people when your shoot is happening. It also might help to have a number that you can pay everyone per shoot day. Even $100/day is a good incentive. But as you might guess, that can add up.
A good place to start is checking out local short films and finding examples of cinematography that you like. You can start looking up the DPs that you find, and see if they’re interested in working on your project. Try doing the same thing for sound recordists and ADs.
Finally, you might consider joining local Facebook groups for Indie Filmmakers and find your crew that way.
My experience has been that finding a good Sound Recordist is the hardest thing. And if you expect to get a good one, you’re going to need to pay. They typically cost around $700/day in my city. If you’re in a huge metropolis, you might have an easier time of it. But where I live in Vancouver, Canada, it’s a nightmare.
In other words, if you randomly meet a sound recordist at a bar, become their best friend immediately and never let them go.
Also, I speak from experience when I say that shoddy audio will ruin a production. And the amount of time that goes into editing a film means that you do not want to be doing this while working with shoddy audio.
Finally, bad audio can’t be fixed in post. If it’s got a lot of noise, or the boom operator kept hitting the microphone against the furniture, or the clothing your subject is wearing is making nylon noise, or there’s a high wind and you’re not using a blimp, or you’ve got tons of interference, this audio becomes nearly impossible to save.
So, as counterintuitive as it may sound, put your audio quality above your image quality when you’re thinking about your budget.
It’s hard to do. But at least try. This is one decision you won’t regret in post.
Casting or Finding a Subject
If you’re making a documentary, then your subjects will be based entirely around what story you’re trying to tell.
If this is your first micro doc, then I’d recommend creating a piece about someone you know. Don’t aim for the stars on your first go at it. Keep your goals reasonable.
For a narrative piece, casting means finding actors that will fulfill the needs of the story and the tone of the piece. Aside from bad audio, the biggest thing that kills most short and indie feature films is bad acting.
What is bad acting, anyway?
It’s acting that doesn’t feel real. It doesn’t feel natural. It’s awkward. It sounds canned. It feels like a line reading. There’s no element of surprise. It’s dry. It’s dull. It’s lifeless.
Casting is your most important job as a director. Don’t take this lightly.
Finding a Location
Location is just as important for filmmaking as it is for real estate.
Not only do you need a location that looks authentic and helps tell your story, but it can’t be full of crazy loud noises, it can’t be run over with people, and it has to be available at the right time based on the lighting that you need.
The key to figuring out if a location is going to work is going there in person and photographing it during the time of day you think you need.
Photograph set ups similar to the shots you’re thinking of doing.
You can use a friend as a stand-in for the characters. You’ll look at the shots again later and see tons of issues you didn’t notice before. That’s a good thing. You’ll be able to solve them if you see them in advance.
Production Design
Production Design is what creates the physical look of the film. It’s like interior decorating at 1000x speed.
Except in the case of documentaries that are shot in a run-and-gun style, you’ll always need to have some element of design go into the look of the physical space.
At it’s most basic, this could just be moving some potted plants around so your interview shot looks more alive.
On a narrative feature film, this means employing a Production Designer and an entire team of people to create a world that doesn’t exist in reality.
For solo filmmakers, doing a super simple version of production design can make a huge difference to the final quality of your film. I spend quite a bit of time on this element before shooting any interview. Not once have I walked into a space and kept it the way it was. You have to think that you’re capturing an image that will last potentially 20+ years. That image needs to help tell the story. It needs to evoke a feeling.
Something as little as noticing that a lamp has an ugly sticker on it, and removing it will make a difference.
Noticing that you’ve got an electrical outlet in your shot, and shifting a plant to hide it will make a difference.
As a solo filmmaker, you want to tend to your set and view it critically, changing whatever you can to help best tell the story.
Video Break! Professional Production Designers Talk About Their Work
Costume Design or Wardrobe Suggestions
Costume design is largely overlooked by amateur productions, but I know you won’t make that mistake.
In some cases, you can get away with actors wearing their own wardrobe items. But you have to make sure that it works with the storyline.
How many short films have you seen with people wearing ill-fitting suits? Well, I’ve seen quite a few. In real life, you probably shouldn’t judge someone by how they’re dressed.
In film life, your audience immediately judges a character by how they’re dressed.
When it comes to documentary work, you can (and must) make wardrobe suggestions to your subject. These are for both technical reasons and to help enhance the story.
Examples of suggestions include:
Don’t wear stripes or small patterns (this can create moire)
- Wear fitted items that won’t move excessively during filming
- Wear a colour that matches your eyes (this prevents people from wearing colours that make their skin look sallow)
- Wear a colour that contrasts against the wall colour
- Don’t wear anything synthetic if you’re using lavalier mics (this rustles and creates noise in your audio that is unpleasant and cannot be removed in the edit)
Planning Your Lighting
If you’re making a narrative film, your DP or Cinematographer will plan the lighting.
They’ll do this well in advance based on breaking down the script and working with the feeling you’re trying to create and the story you’re aiming to tell. But if you’re working solo, then it’s up to you to plan your lighting.
Creating a cinematic lighting plan means you must go to your location at the time of day that you plan on shooting and taking photographs. You’ll analyze the light—how much light is there, the direction of the light, the brightest and darkest areas, places with mixed light (natural light + bulbs), and how variable the light might be through the day.
From there you’ll decide if you need to add studio lights into the mix. You have two basic choices when it comes to using lights: soft and hard.
Soft lighting has an element of diffusion that creates a soft look without harsh lines and shadows. Similar to what you’d find on a cloudy grey day.
Hard lighting usually is a combination of a bulb and a lens that focus the light. The idea is to get contrast and stark lines. Think film noir.
Lighting is a topic all its own, but if you start from a place of paying attention to soft vs hard light, you’re on your way.
Renting Gear vs. Buying Gear
Something you need to know: rentals rule!
Some production companies work almost exclusively with rentals. In fact, most production companies rely on rentals for most of the projects.
Why is that?
Because for every area of gear (camera, lenses, stabilization, lighting, sound recording, monitors) there is a myriad of options designed with specific types of shoots in mind.
What you need for a run-and-gun documentary shot in the desert is quite different from what you need on a feature film shoot in the tropics.
If your goal for the next 12 months was to learn everything there was to learn about film lighting, you couldn’t do it. It’s actually impossible. The same goes for every single piece of gear. There is gluttony of choice.
That being said, I still own a lot of gear.
Here’s the rule: buy the gear that you know you’ll use on every single shoot you do.
Rent the gear that’s prohibitively expensive and you’ll only use on some shoots.
If you want more information on what gear you need to get started, take this free filmmaking quiz. You’ll discover your filmmaker archetype and then get a customized list of the gear and strategies you need to get started.
Where’s It Going to Screen?
This is a critical decision. And one you need to make before you find your crew or press record.
Where your film is going to screen will affect every single decision you make. If it’s a film designed for the online space your leeway is a lot greater than if you’re aiming for a theatrical run.
There are strict standards for every single form of distribution.
The technical aspects of what is allowed on television versus steaming versus a film festival are varied.
You need to know in advance what your films final resting places will be so you can plan for success.
What to do? Decide on the top places you want your film to screen from film festivals to streaming sites, then look up their technical requirements for films. That’s what you’ll use to guide your technical decisions moving forward.
The good news? If you’re a solo filmmaker working to create media for the online space, you can relax a bit. At this point, as long as you’re shooting with a resolution of 1080p or more in a minimum of 24fps with clean high-quality audio recorded at 48Khz.
Big Screen vs. Small Screen
Filmmaking Production Basics
Production is the so-called glamorous part of filmmaking.
Really it’s just loads of hard work with a touch of craziness and a lot of fun. It’s the part of moviemaking that everyone tells stories about. And it’s the part you see images of online when someone’s trying to sell you a camera or a course. It’s what everybody thinks of when you say, “I’m making a movie!”
Nobody thinks of the people in the editing room sweating it out for 6 months. But anyway…
Production includes every single day of shooting, from the main shoot days to the pick-up shoots.
On an indie narrative shoot, you’d be aiming at anywhere from 24-28 days of shooting. On an ultra-low-budget indie you’d want to aim from 10-12 shoot days.
But a bigger film full of visual effects might take a lot longer. Alice in Wonderland had 40 shoot days. While the 1939 epic children’s movie The Wizard of Oz took 6 months of shooting with cast working 6 days per week with 12-15 hour days. But 6 months of production is not the norm.
For a solo production, you’re aiming to get it in the can in 1-to 2 days.
The key to a your production days going smoothly is organization. For aspiring feature filmmakers or narrative short makers, you’ll need an Assistant Director to make sure everything happens on time.
Production Paperwork
Here’s a list of the typical paperwork you need to keep a narrative shoot on track:
- Call sheet – this sheet goes out to everyone on production the night before an has all the critical info from weather, location, to cast and crew to what’s getting shot
- Shooting schedule – what’s going to get shot, in what order
- Camera log/report – this is the job of the camera assistant usually – they log the footage and make notes that will be useful during editing
- Sound report – this is the job of the sound recordist and this is a log of all takes with notes that will help in editing
The paperwork you need for a solo film shoot is a little bit different.
And you won’t find it online because as of yet solo filmmaking has yet to become a popular art form. For my own solo filmmaking doc-style shoots I’ve created a Foolproof Shoot Plan.
This is what I always use for each mission-critical solo filmmaking shoot:
- Lighting plan for each set up
- Mini storyboard for each set up
- Interview questions in the order of importance
- Shot list of everything I need to capture
- Gear list with checkboxes to make sure that what I bring returns with me
- Foolproof Shoot Plan which includes lighting/sound potential problems and solutions and a quick story breakdown as a reminder
If you’re a creative and you can handle doing a little bit of paperwork, then your chances of becoming a professional filmmaker just shot way up. Especially if you’re going to be self-producing to start out.
The directors who are pure artists and can’t manage a Google Sheets doc always have a producing partner. There’s no way to avoid doing paperwork when creating a film of any scope. Why not? Because there are so many details to keep straight. Especially if you’re starting out, it’s too much to ask of your brain to keep it all organized.
Filming with a DSLR, Mirrorless, or Cinema Camera
Finally, we get to talk about cameras!
That’s the part most filmmakers get obsessed with, even though lenses are way more important. But it’s true that if your cinematography is a total mess, it’ll be hard to get an audience for your film.
You have three choices when approaching a film: a Cinema Camera, a DSLR, and a Mirrorless Camera.
There are some basic differences between the three cameras. But let’s start out with every filmmaker’s favourite: the Cinema Camera.
Cinema Camera
Cinema Cameras are typically designed for narrative filmmaking where an exceptional amount of gear and crew members are used.
It’s unusual to find a cinema camera that will work perfectly straight out of the box in a myriad of shooting situations. Cinema cameras are often bulky or boxy and not designed for handheld. They’re essentially designed to give you the most glorious image quality possible at a particular price point.
Now that’s a bit vague. But for cinematographers, the mark of great image quality isn’t the frames per second or whether a camera shoots in 8k. Instead, it’s the camera’s color science and dynamic range.
When it comes to COLOUR SCIENCE the main thing to pay attention to is the tonal variation of the images produced.
In plain English, you want to know how many different colours can your camera’s sensor capture. An 8 bit image has 256 tonal values. While a 16 bit image has 65,536 tonal values. You can see the difference in these graduations of colour if you watch two videos side-by-side. Calculating tonal values is done by multiplying the number 2 to the exponent of the bit.
16 bit 2x2x2x2x2x2x2x2x2x2x2x2x2x2x2x2x2
i.e. 65,536 tonal values
8 bit = 2x2x2x2x2x2x2x2
i.e. 256 tonal values
DYNAMIC RANGE may also be called brightness range or luminance range.
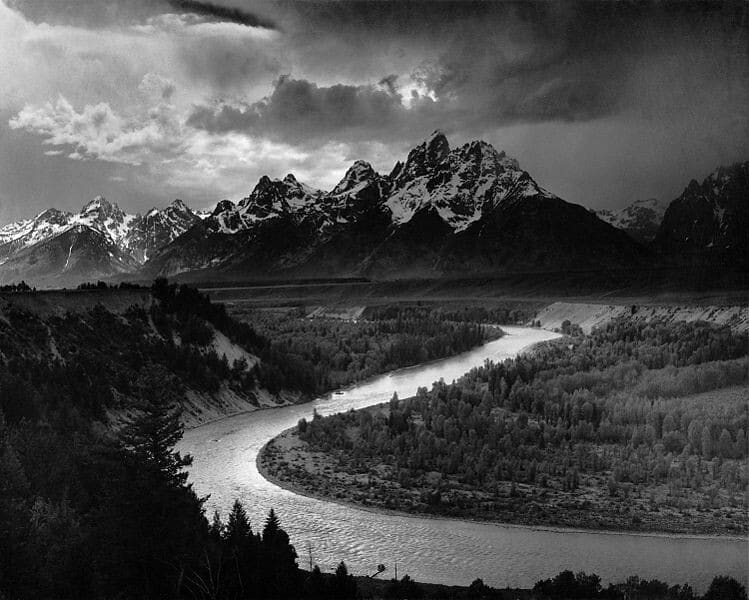
It refers to how well your camera’s sensor is able to capture the range of values from BRIGHT to DARK. Imagine a scene that has a bright blue sky and a darkly shaded tree. In the sky, the white clouds will be the brightest part of the image. Under the tree there will be extreme shadows that are nearly black. A camera with 12 stops of dynamic range it might be able to capture the detail of the image in the dark and bright areas.
If your camera has less stops of dynamic range then the bright areas will be blown out (zero detail at all – pure white) and the shadows will be crushed (zero detail at all – pure black).
The human eye doesn’t crush blacks or blow out highlights.
It can see most of the detail in any scene because it adjusts to the light available and it rapidly switches back and forth from the dark part of the scene to the brightest part.
Dynamic range is measured in stops. For each stop you’re doubling the brightness that the camera’s sensor can effectively capture. That means there’s quite a difference between a camera that can capture 8 stops of dynamic range and 14 stops of dynamic range.
At present, there is no camera able to handle the incredible brightness range that exists in nature.
So you’ll never actually be capturing an image that is “true to life.” Not to worry though. As long as your image is compelling and the necessary details are visible, then you’re in good shape.
DSLR Camera
The dawn of the DSLR age is what opened up filmmaking to more and more people.
DSLR stands for Digital Single Lens Reflex. These cameras were created for photographers. But as technology advanced, and as the camera makers saw an opportunity, video capabilities were improved.
Two benefits of using a DSLR are the huge array of lenses available and the low cost of the cameras themselves.
There are a wide range of DSLR cameras available, and it’s safe to say there’s one at almost every price point. In particular, you have many DSLRs that have been barely used but are being sold for half the original cost.
For every DSLR camera, there are hundreds of lenses you can use. Also because DSLR cameras are so popular there are plenty of lens converters and adaptors. This means you could use vintage lenses on your new digital camera simply by adding an adaptor.
In addition to the incredible choice of lenses, DSLR cameras typically provide beautiful skin tones.
Canon and Nikon have particularly beautiful colour science when it comes to rendering skin tones. I find their image quality to be more pleasing to the eye than Sony and Panasonic cameras. But that’s just personal preference.
One final reason DSLR cameras are so popular is their relatively analog feeling. Unlike a mirrorless camera, a DSLR does allow you to look straight through the viewfinder and it typically has the knobs and buttons expected on an old-school SLR camera. This is something many filmmakers like as it can feel more pleasant when compared to always being inside a digital menu.
Now before we move on, let’s talk downside.
DSLR cameras, particularly the low-priced ones, are designed for photographers. That means that some of the highly useful video functionality is missing from them. There are three main things that I wish my DSLR camera had but doesn’t.
- Zebras
- Focus peaking
- High frame rates
Zebras are an overlay on your screen that shows you when part of an image is either over or underexposed. If you’re using just the 3-inch monitor on your camera, this is critical. Most mirrorless cameras have this feature but only the super high-end DSLRs do. You can use a software hack called Magic Lantern to open up this functionality in your DSLR but then you render your warranty worthless.
Focus peaking refers to another overlay that shows you exactly what part of your image is in focus. You’ll see an array of tiny dots on your screen where the image is in sharp focus. Again, if you’re shooting on the go and you don’t have an external monitor, focus peaking is a huge help.
Finally, high frame rates mean you can shoot slow motion. (120 fps at 1080p is ideal.) High frame rates are often missing from DSLRs. Once you start paying $3000 or more for your DSLR, you’re going to get high frame rates. So this is a matter of budget. But I think it’s lame that the camera companies don’t just put it on all DSLRs. I highly doubt it would cost them much to do so, but they are trying to push buyers into a higher tier of camera.
Mirrorless Camera
Mirrorless cameras have become more and more popular over the last five years and with good reason.
They’re lightweight. Like really lightweight. They typically have better resolution and frame rates for a better price than DSLRs. They have great image stabilization so that shooting handheld can be a lot smoother. And they often do better in low-light situations than their DSLR counterparts.
To be competitive, the makes of many mirrorless cameras have stepped up their game in the last few years.
So why isn’t everyone using mirrorless cameras if you get more bang for your buck and they have arguably better functionality?
Well, it’s the user experience, the lens mount, the colour science, and the crop factor that are preventing more people from becoming converts.
In terms of user experience, mirrorless cameras do typically feel very digital. You’re often forced to use the menu to make any changes. Their controls don’t seem to be as intuitive as the DSLR cameras. For many people they just aren’t as fun to use. While for others, the fact that they are so lightweight and have great image quality outweighs that experience.
Mirrorless cameras typically have a micro-four-thirds lens mount.
This means you can’t just stick your Canon EF lenses on these cameras and expect them to work. While there is a huge array of micro-four-thirds lenses, many people have already invested in DSLR lenses and don’t want to add a very costly adaptor to the mix.
When it comes to colour science, it’s not that mirrorless cameras don’t create high-quality images.
They do. But if you’ve built up a preference for Canon imagery, then the way Sony and Panasonic images look might not be to your liking. Canon does have their own line of mirrorless cameras, but they don’t seem to have taken off in popularity in the video world.
Finally, many mirrorless cameras have a crop factor of 2x.
This is because they often use a micro-four-thirds sensor. The field of view with a micro-four-thirds sensor is much narrower than that of a full-frame DSLR camera with a larger sensor.
If you took a 50mm lens and put it on a mirrorless camera that has a crop factor of 2x, your image would be much more “zoomed in” compared to the same lens on a full-frame DSLR.
There are also many DSLR cameras that have a crop sensor.
They usually have an APS-C sensor with a crop factor of 1.6x. This does make a difference to your lens choices, but it’s not quite so dramatic.
Now it sounds like I’m anti-mirrorless, but I’m not. These cameras are incredible. If you want something lightweight, then this might be the best option for you. Especially if you’re a run-and-gun shooter, then this is a great option.
The Sony Alpha III appears to be the most popular mirrorless option within the videography and filmmaking world.
And since I’ve been such a Negative Nancy about mirrorless cameras, I feel like I should show you that the footage can be amazing. If you were going to just do travel videos, you probably can’t get better than this camera. Buuut, do you notice that this whole video is slow motion? You’re not going to be shooting a narrative film in slow motion unless you’ve lost your mind. So for me, this is a run-and-gun camera not a shoot-a-short-film camera.
And if you’re shooting a narrative film, and you’re renting a camera, it’s unlikely that this will be your first choice.
STORY ENVELOPE FILMMAKING LETTER
Get filmmaking tips to your inbox once per week, plus the free Mini Filmmaking Course.
Join 2000+ filmmakers, and get filmmaking tips, lessons, gear tips, stories, and motivation! Also, whenever I write an epic (ultra long and useful) blog post about filmmaking, I’ll send it to you.
Recording Audio
Sound is more important than your image.
There, I said it.
It’s true. And yet, so few aspiring filmmakers want to know anything about sound. Which is why this will be so brief. If you want to learn more about the basics of sound, click the button below and sign up to get a free 20-minute video where you’ll be walked through the basics of recording sound when you’re starting out.
But before you do that, let’s talk the basics of sync sound, starting with a discussion of the ever-important SLATE.
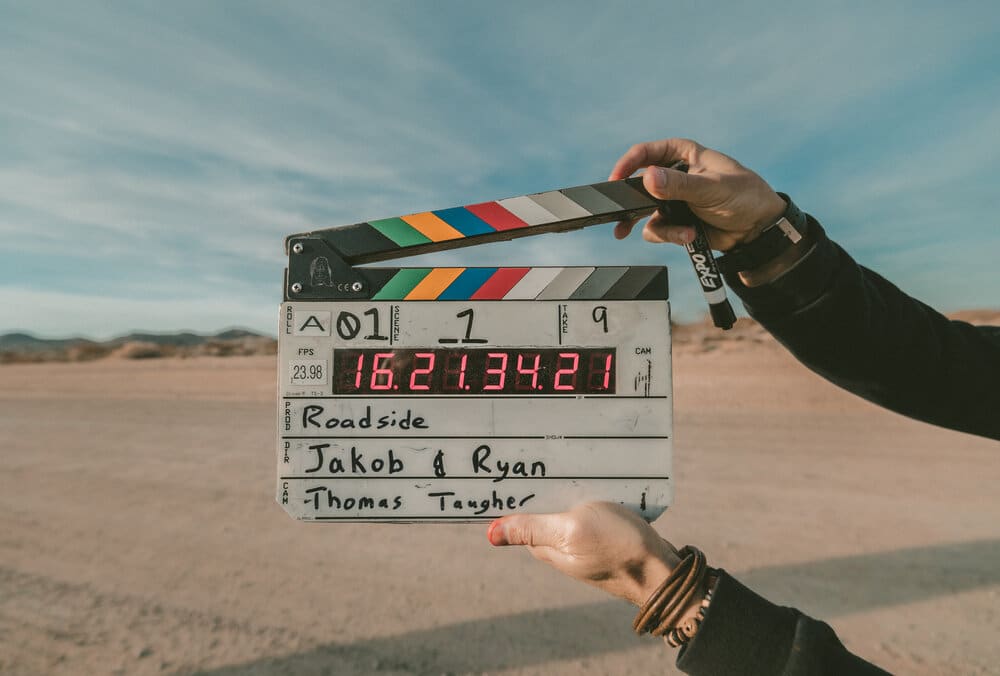
The Slate or Clapperboard
You’ve seen a film slate a million times on TV and in movies about making movies. But do you know why it’s used?
The main purpose of a clapper used to be as an aid in syncing sound.
When you clap the top of the board against the bottom you get a peak in your audio sound waves. The wave literally spikes up because the sound is so strong. You’ll see that spike in both your scratch track (the audio from your camera) and your dialogue tracks (the audio from your external recorder). Then when syncing sound in your editing suite you can line up those spikes and boom—you’ve got synced sound.
Today, you can usually sync up your audio in post-production automatically without needing a visual reference.
In Premiere Pro, you just select your video clip and your audio track, you go to Synchronize and choose AUDIO, and it does it for you. There’s also a software called PluralEyes from Red Giant which is dedicated just to syncing up your audio.
Even though you technically don’t need the clapper to sync sound, it still gets used as a safety measure.
Plus the clapper has another purpose. The name of the production as well as the Scene # and Take # are also written on the board. This can help the editor if organization has gone sideways and they need to find a particular clip. And organization will indeed go sideways if you’re an indie production working under pressure with a low-budget.
Using a clapper is a must if you’re shooting a narrative film.
But for run-and-gun documentaries, it’s not going to be used. You can’t expect to get off-the-cuff footage if you’re jumping in with a slate every two seconds.
I also don’t use a clapper in my solo filmmaking. For interviews, which is when I use an external recorder, I simply run the video and the audio for the whole process. I only stop recording if the subject needs a break. That means more footage and more data that you need to backup, but it also means I don’t miss anything and syncing is easy. If you only have two files to sync, it’s an easy day at the office.
For a narrative film, I would never do it without a slate. In fact, I’ve had that experience, and it was a nightmare. So always make sure you’ve got a slate and a backup slate. Meaning if your sound recordist says they’re bringing a slate, bring one yourself. Don’t start shooting a short narrative film without a slate.
Final note, if you’re worried about sync sound, but you don’t have a slate, you can also just clap your hands together before every take. That will create the same peak in audio which will help you sync sound in post.
If something goes sideways with your scratch track and for some reason your camera stop recording any audio, you’ll be glad that you have a visual reference. (This actually happened to me, and I had to sync my sound by lining up the movements of my subject’s mouth. Not fun!)
Recording In-Camera Audio
For on-the-go videography, it’s actually quite common to record in-camera audio. Now, don’t get too excited. This doesn’t mean you get to just record using your camera’s internal recording device.
The main reason in-camera audio is problematic is because your camera usually has noisy pre-amps. What’s a pre-amp? It’s the thing that amplifies the sound that’s coming into the camera so that you can actually hear something in the recording.
If your pre-amps are noisy, your audio will sound like garbage.
So here’s the workaround: get a good external pre-amp and use that to amplify the sound. Then record straight onto your camera’s SD card with perfectly synced sound.
For this set up you’ll need the following:
- Pre-amp
- 1/8” cable that connects your Pre-amp to your camera
- Shotgun microphone with foam
- Hot shoe mountable Shock Mount (unless your mic has one with it)
- Tons of batteries for your pre-amp (they eat up battery power)
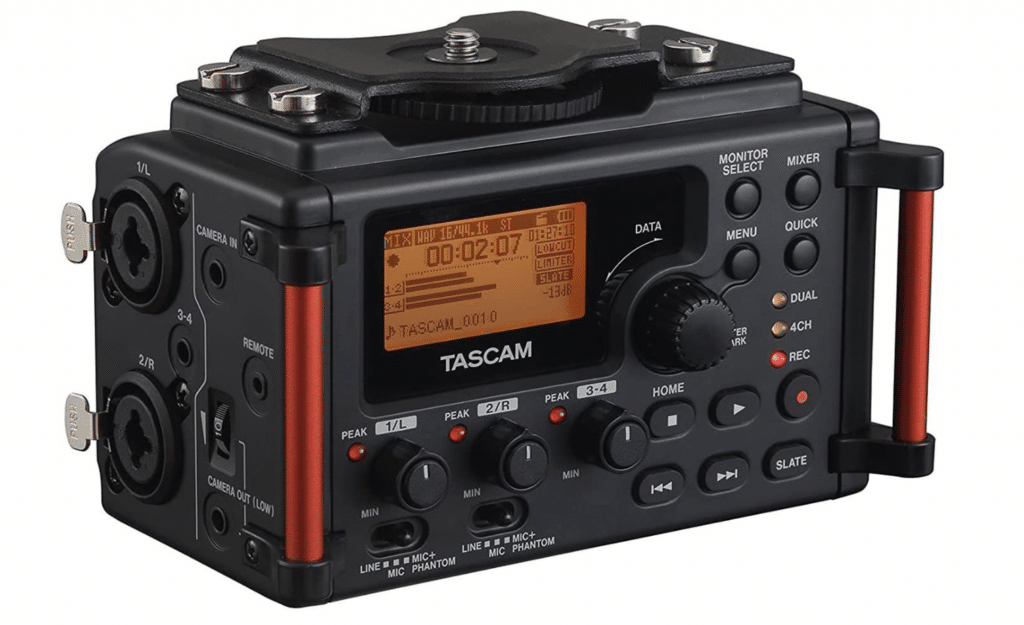
If I were starting over and wanted to buy a run-and-gun audio setup, I would get (without a doubt!) a Tascam recorder and the Rode VideoMic Pro. If I knew I also wanted to do sit-down interviews, then instead of the Rode Video Mic Pro, I’d get the Rode NTG-2 and put it on the shock mount.
The End
While there’s still plenty more to cover, it’s safe to say this blog post has gotten out of hand.
It’s over 20,000 words long, and my hands are getting tired.

About the Author
Hi! I’m Colette Nichol. I’m a solo filmmaker and story strategist based out of rainy Vancouver, Canada. I’ve been making videos and micro films for small businesses and global brands since 2014.
Plus, I LOVE to help aspiring filmmakers pursue their dreams and start making films. This blog is designed to help you gain the knowledge you need to become a filmmaker.
If you want more, get on the waitlist for the Story Envelope Academy Solo Filmmaking Mentorship Program. It opens up one time per year and is the best way to become a filmmaking or video pro fast!
CLICK HERE to get on the solo filmmaking mentorship waitlist.
Related Filmmaking Articles:
➩ How I Got Paid to Learn Documentary Filmmaking
➩ How to Capture Attention in the First 2 Seconds of a Video
➩ How To Get (Beautiful!) Blurry Backgrounds For Your Photos and Videos
➩ The 10 Elements of a Good Story for Video, Marketing, and Everything Else
➩ The Definitive Guide to Manual Exposure for Photo and Video
➩ Filmmaking Tools: It Might Be You…Or It Might Be Your Tools
")