
Article by Colette Nichol, Solo Filmmaker and Story Strategist

Becoming a Filmmaker Isn’t About Gear
It’s time to learn filmmaking fundamentals. When you’re learning filmmaking, it’s easy to get caught up in the endless rabbit hole of YouTube gear-review videos.
Hell, I know I did!
But here’s the truth: most of those videos won’t make you a better filmmaker. They’ll make you a better gear head for sure. But if you’ve watched a few Oscar Round Tables with well-known Directors, Cinematographers, and Producers, you’ll notice the marked absence of gear discussions.
Okay, it’s true that Cinematographers do go ape-shit over a nice lens.
But other than that, the thing that’ll make you a better filmmaker is an understanding of the basics.
Then, of course, you’ve got to apply those basics by taking on a project you’re passionate about.
Right, sermon about not becoming a gear head complete, let’s get cracking.
If you haven’t read Part I of Filmmaking Basics, make sure you do. This is the continuation of that post. We’re going to go deeper into Visual Storytelling, the Basics of Digital Cinematography, and Post-Production.
Grab a stiff cup of coffee and cuddle up with your laptop—this’ll take a while.
Topics Covered In This Article
- Visual Storytelling
- Shooting Coverage
- The Grammar of Filmmaking
- 12 Visual Elements of Filmmaking
- Camera Movement
- Practical Aspects of Digital Cinematography
- How to Master Manual Camera Settings
- Post-Production Basics
- Software for Video Editing, Audio Editing, and Colour Grading
- Free Filmmaking Quiz – What’s your filmmaker archetype?
Learn Filmmaking: Start with Visual Storytelling for Filmmaking
Let’s just demo visual storytelling by using a basic scene, then breaking it down into shots.
A man wearing a dark blue polyester suit that’s two sizes too big sits on a fold-up chair in the middle of an empty waiting room.
He rubs his hands on his thighs, wiping away the sweat from his palms.
There’s no air-conditioning. Sweat drips down his temple. He wipes his temple with the edge of his suit jacket.
On the wall, the hands of a clock tick.
The man’s eyes dart toward the clock.
SHOT SEQUENCE:
Medium Close up – man’s hands wiping on thighs
Close up – man’s face, sweat dripping
Close up – a broken fan
Full shot from the side – man sits in the chair – we see the empty waiting room – lines of chairs, his foot tapping.
Medium – man in chair, shot straight on, his eyes dart towards the clock.
Medium – clock on the wall, hands ticking
Close up – clock, hands ticking
Extreme Close up – clock hands tick, tick, tick
In this sequence, we’ve told a story by just using visuals.
No dialogue was needed to get the point across. We’ve shown the audience that there’s a nervous guy in a hot empty office waiting to speak with someone who’s probably important. The situation is not good and might even be quite bad. This guy doesn’t have much money as seen in his ill-fitting suit. He’s worried, and he might even be freaking out internally. The emphasis on the clock hands ticking shows us that this situation is potentially nefarious or at a minimum nerve-wracking.
The heart and soul of visual storytelling is the shot sequence.
But within the construct of the shot sequence, you have every other element of visual storytelling including:
- Framing
- Transitions
- Shot angles
- Shot sizes
- Camera movement
- Continuity, including eye lines and scene direction, and the plane of action
- Set Design
- Wardrobe Design
- Lens choice (shallow depth of field or not?)
Whether you shoot to tell a story visually or you shoot simply for coverage, as we’ll discuss below, you’ll need to think about all aspects of what’s inside your shot. When you’re aiming to learn filmmaking, one of your top areas of focus should be framing and shot sequencing.
Shooting Coverage
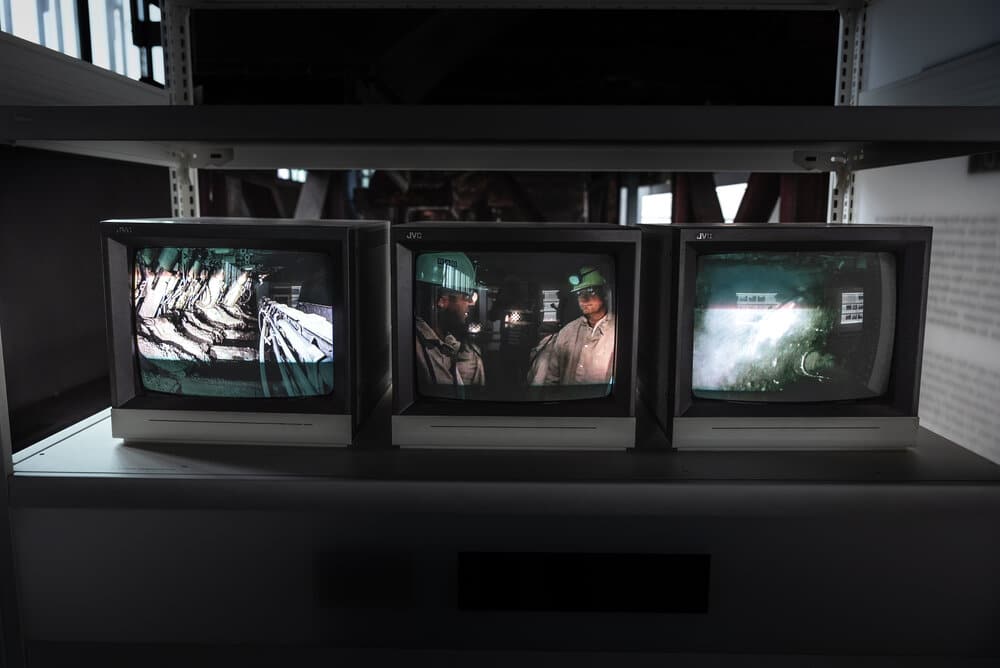
The television that you watch every single day has little visual storytelling.
What you’re watching is called coverage.
If you’re shooting for coverage rather than to tell a story visually, you’re not too worried about the visuals telling the story. You’re relying on the dialogue, the context, and the actors to tell the story. Shooting for coverage means your primary concern is getting enough footage that’ll cut together.
Again, your primary concern isn’t visual storytelling.
When you shoot for coverage of a two-person scene this is what you do:
- Get a Master of the whole scene.
- Get a two-shot of the characters doing the whole scene.
- Get an over-the-shoulders medium shot of Char 1 for the whole scene.
- Get an over-the-shoulder medium shot of Char 2 for the whole scene.
- Get singles of both characters for the whole scene.
- Get close ups as needed.
Do you see what’s happening here?
We’re just shooting the entire scene over and over with different shot sizes and types.
If you turned off the sound on most television shows, you’d get almost none of the plot. The creators aren’t focusing on visual storytelling. They’re focusing on getting coverage, which is usually because their shows are dialogue-driven. Think of every single sitcom ever made. They’re all shot using this method of just focusing on coverage. In such cases, you’ll also hear people say things like, “Let’s get one more for safety!”
That’s because they might have liked the take, but maybe the emotions or gestures won’t match up perfectly, so they want to get another one.
Shoot to Tell a Story
If you want to learn visual storytelling, you’ve got to start watching really good movies and pulling the shot sequences apart.
Then you need to start creating your own shot sequences. Think of a scene in terms of how you can show the story, the emotions, the context, and create tension. Think beyond whether shots will be cuttable.
Side note: I’m not saying there’s anything wrong with shooting for coverage, especially if you’re making television. But it’s not strictly visual storytelling.
Yes, there are visuals, but you’re not relying on visuals as a key component of the storytelling framework. Instead you’re relying on the dialogue and the actors’ expressions and gestures and general performance to do the better part of the heavy lifting.
That’s not visual storytelling that’s theatre that has been filmed and put on television. Truly most sitcoms would work just as well as theatrical productions as they do television. People sitting on a couch or in the kitchen bustling about while unravelling some drama or comedic situation…that’s theatre.
Learn the Grammar of Filmmaking
Understanding and using the grammar of filmmaking will allow your shots to be seamless.
This grammar exists because over the years filmmakers have discovered basic rules of how to maintain the reality of what’s on-screen. The worst thing that can happen to an audience while watching a film is that they get pulled out of the story because something doesn’t make sense.
If you see a microphone dip into the shot, suddenly you remember that you’re watching a movie. The story doesn’t seem to matter anymore.
The same goes for a mismatch of action.
If an actor’s hand is in the air in one shot and in his pocket in the next cut, there’s a lack of continuity that will pull the audience out of the story flow.
Aside from preventing basic technical flaws, the biggest challenge in filmmaking is continuity. If you lose continuity, you’re likely to lose your audience.
Just yesterday, Jimmy (my partner) and I were watching a new film on Netflix. Suddenly Jimmy yells out, “First mistake!” And then slumps into his seat.
I pause the movie. “What?”
“Go back and watch the table.”
So I go back ten seconds and sure enough, there’s a huge continuity error.
One second there’s a tall milkshake on the table, and the next second it’s gone and there’s a glass of water instead.
Continuity Error Alert!
These do look kinda different don’t they? And not just because the backgrounds are different. This issue of shifting and changing objects is one of the biggest trials and tribulations of the person in charge of continuity…and then the editor.


We kept watching the scene, only to encounter the most shockingly bad sequence I’ve ever seen.
(FYI the acting was good, but the cutting was baaaad.)
The milkshake and water go back and forth from one shot to the next. Then a plate of fries magically appears. And THEN the plate of fries is magically empty!!!
All of this is cut together as if it’s continuous action. No fun jump cuts that show time passing because of the food and drink change. Nope, it’s just straight-up totally flawed filmmaking/editing. Ouch.
Probably the reason this happened was that the scene was too long and they knew they need to cut it. But by doing it the way they did they treated their audience like idiots. Never ever think that your audience won’t notice a plate of fries suddenly appearing from one cut to the next!
The ultimate point of all filmmaking rules is to maintain the illusion of continuous action i.e. continuity.
Beyond that, your choices will come from the style and theme of the film and how you want to tell the story
visually.

12 Visual Elements of Filmmaking
Each of these basic elements could be a post of their own; but let’s go over these 12 aspects in brief.
- Continuity (action, props, emotion, hair/makeup, eyeline, lighting, weather)
- 360 degree rule i.e Plane of Action
- 30 degree rule
- 20% rule
- Screen Direction (moving towards something)
- Eyelines
- Headspace
- Shot Sequences
- Shot Angles (hero shot, dutch angle)
- Shot Sizes
- Framing (symetry, match cut transitions, rule of thirds, s curve)
- Camera movement
CONTINUITY
Make sure that no elements in your film kill the illusion of continuous time, place, and action.
If an actor is drinking a cocktail, the level of the drink must correlate with every shot. If in one moment (in a wide shot) her cocktail is full, and the next moment (in a medium shot) her cocktail is empty, yet she hasn’t taken a sip, then you’ve failed the continuity test.
360 DEGREE RULE
In a scene, there is an invisible line that runs through the action. This is called the plane of action. Wherever the movement takes place is the action. If you cross that invisible line with your camera from one shot to the next, you’ll create a jumping effect in your visuals. The actor who was on the left side of the screen will now be on the right. Not good, don’t do it.
30 DEGREE RULE
This rule states that if you want your footage to be cuttable, you need to move change your camera POSITION by at least 30 degrees.
Now be warned that it still needs to be logical. My biggest pet peeve is watching video interviews where they cut from a shot that’s straight on to a shot that’s a close-up of the side of the subject’s head. It’s nuts! It kills the feeling of intimacy and it’s such a disconnected cut that it pulls you out of the flow.
20% RULE
This rule stats that for shots to be cuttable, they need to be 20% different from each other in either angle, field of view, depth of field, etc.
If your shot is only 10% different from the previous one, the cut will be noticeable. This would typically be called a jump cut and is commonly used on YouTube.
>>Related Reading: Three Basic Rules of Visual Storytelling for Filmmaking
SCREEN DIRECTION
Screen direction refers to the direction that your actors or objects are moving.
If you’re telling a story where your actors drive from New York to LA, then all the shots need to show the car moving from RIGHT to LEFT. This creates the idea in our mind of EAST to WEST.
If a character looks to the left and then we cut to someone walking in the door. We assume that the main character has just looked at that new person. In the next shot if we show our main character walking towards the door they must be walking from right to left? WHY? Because that’s the direction they looked.
Screen direction can be tricky to grasp until you do rough sketches of scenes and/or start pulling apart movies.

EYELINES
The direction that your subjects or actors look must be logical. That’s really it.
If an actor looks up in a medium shot. In the next shot we expect to see something up high because we want to know what they’re looking at. If you instead cut to something in their hands, it would be disconcerting.
If an actor looks left to the door and their gaze is slightly downward in one shot, if we cut away and cut back their eyes must still have that same line towards the door.
Think of any person’s gaze as a LINE. See the line from their eyes to what they’re looking at. Make sure that line is logical.
HEADSPACE
Is there enough room in the frame above the subject’s head? Or too much?
For new solo filmmakers and videographers, the problem is usually too much room above the head or not enough. It’s okay to cut off a subject head—that’s called giving your subject a “hair cut” FYI. 🙂 But you normally only do that in a medium close up, close up, or extreme close up.
In a medium shot, you don’t need a mile of room above your subject’s head unless there is an artistic reason for doing that. You’re basically just giving the subject enough room above the head so that if they suddenly improved their posture, they wouldn’t get a haircut.
SHOT SEQUENCES
The shot sequence is the key to visual storytelling and filmmaking.
It’s how you combine your images together, one after the next, that creates the illusion of reality and the art of storytelling. A typical shot sequence starts with a wide shot which establishes the context and then it moves in closer, bringing the audience deeper into the scene. But that’s just one way of doing things. There are as many ways to structure a shot sequence as there are nose jobs in Hollywood.
SHOT ANGLES
This refers to the angle of shot in relation to the subject.
Shooting from down low to above is called a Hero Shot and the angle makes your subject seem larger than life. Shooting straight on is considered a more “honest” angle in documentary filmmaking because it doesn’t manipulate the thoughts of the viewer. Shooting on a downward angle can make something feel more diminutive or victimized. The sweeping shots your get from using a drone give you a sense of space, drama, and luxury.
The purpose of using and getting to know the different shot angles is so you can use them to tell your story and create a feeling in your audience.

SHOT SIZES
This refers simply to the basic building blocks of filmmaking: extreme wide shot, wide shot, full shot, medium full shot or cowboy shot, medium shot, medium close up, close up, extreme close up.
The point of understanding the difference between these shot sizes is so you can communicate with yourself and others. If you can start thinking in terms of shot sizes you’ll be able to plan your shot list much more effectively.
>>Read more about shot sizes in Filmmaking Basics Every Beginner Needs to Know
FRAMING
What’s not in the frame is as important as what IS in the frame.
When people think about framing they’re often concerning themselves with things like leading lines and framing a subject with a doorway or using the rule of thirds. That’s all fine and dandy, but framing goes a lot deeper than some visual rules and tricks.
More important than training your brain to think in terms of the rule of thirds is to train your brain to SEE. Look inside the frame and see EVERYTHING. See the background, see the foreground, see the space the character takes up. Is there too much space around your subject or not enough? Is there anything in the background that shouldn’t be there? Or are we missing something?
If you train your brain to SEE, then you don’t have to get hung up on framing rules.
CAMERA MOVEMENT
One hallmark of videomakers that aren’t necessarily too interested in storytelling is a lot of random movement in their shots.
Old Hollywood managed to survive for a long time without colour imagery and without a ton of moving shots. And yet today we feel like every image we produce must move. Perhaps that’s because our storytelling has deteriorated. But anyway, that grumpy side commentary can wait for another day.
To create a shot that moved back before the Steadicam meant using a dolly and laying dolly tracks or using a crane or jib.
Any shot that moves alongside a subject is called a tracking shot.
That’s likely because you had to lay TRACKS to capture the shot with your dolly. But today these tracking shots are possible with the use of a Steadicam or gimbal.
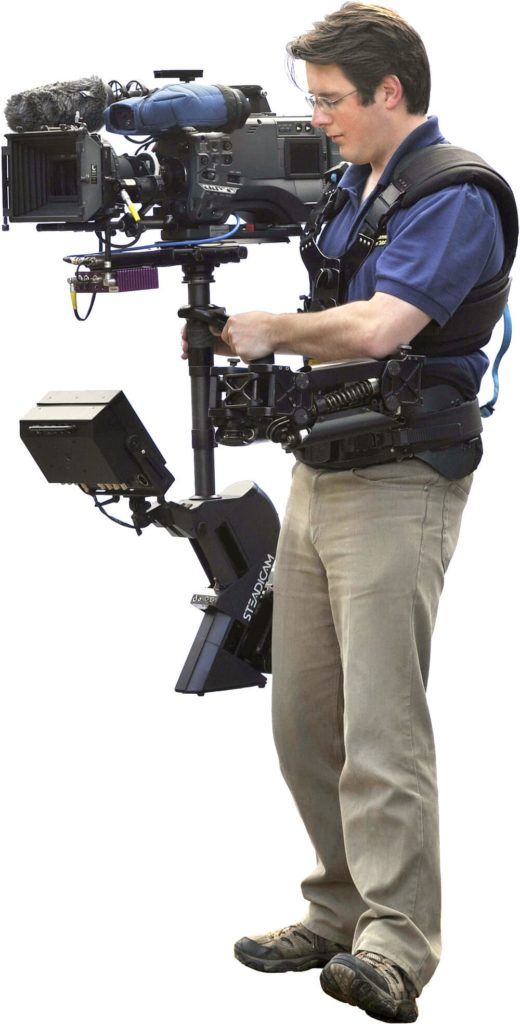
If you watch a little bit from these two videos you’ll see why filmmakers’ brains exploded with excitement when Steadicams and then Gimbals came to market.
It’s a lot easier to have one or two people in charge of moving the shot than an entire team.
As a solo filmmaker you introduce motion into your shot in two ways:
- Shooting handheld using a small rig, a camera/lens with good Image Stabilization, or a gorillapod. You can introduce a kinetic feel to your footage by shooting handheld and moving slightly.
- Shooting with a slider or gimbal. A slider allows you to do just that…slide your camera smoothly. I’ve never used one because it’s never been necessary for a story I wanted to tell. But if the need came up, I’d rent a slider.
While you can rent small jibs, as a solo filmmaker I would highly not recommend doing that.
There’s no story that actually requires a jib to be told. It might be a nice to have, but it’s certainly not necessary. And it’ll eat up a lot of your time and energy. As a solo filmmaker preserving your energy so it can be used for critical creative decisions and connecting with your subject is the most important thing.
The Practical Aspects of Digital Cinematography
The Basics of Exposure and Quality
For the purposes of this blog, I can’t go into great detail on each one of these aspects. So let me just give you a couple notes on each one of these essential elements of digital cinematography that you’re going to need to learn.
- compression and bitrate – how much digital information will your camera capture and how much of it will it keep.
- depth of field – how much of the frame will be in focus.
- exposure – how much light you let into the camera so that the image looks correct – neither too bright nor too dark
- aperture – also called f-stop, this refers to how much you open the diaphragm inside your lens and how much light you let touch the sensor. Aperture also effects your depth of field. Watch the video below to learn more.
Wait, what exactly IS aperture?
This guy does have a bit of a monotone, but there’s some great info in here. BUT, do note that this is designed for photographers. So when he talks about changing the shutter speed, do not take note. Just watch the first couple minutes.
- focal length – how long your lens is and thus how compressed your image is. The longer your focal length the more compressed your image will look i.e. the closer your main subject will look to the background and the more out of focus the background will be. Also the longer the lens (25 mm vs 100 mm) the narrower your field of view will be i.e. it’ll be more “zoomed in.”
- frame rate – how many images per second you capture. 24 fps is normal in film. 30 fps is normal for video. 60 fps and higher allows you to do slow motion in post.
- ISO and Noise – how sensitive to light you tell your camera’s sensor to be. The less light you have in your scene the more you need to crank your ISO. But the higher your ISO, the more digital noise you introduce into your image.
- white balance – the colour in the scene that you tell your camera represents white. This allows your camera to get all the other colours correct.
- shutter speed – how long your shutter stays open when you capture an image. In video or film your shutter speed needs to be roughly double your frame rate so that your footage doesn’t look weird. FYI the shutter is inside the camera while the diaphragm is inside the lens. But both control the quantity of light let into the camera. Shutter speed controls the TIME. While the aperture controls the overall “volume” of light.
- f/stop versus t/stop – photographic lenses have f-stops while cinematic lenses have t-stops. It’s basically the same thing but I think t-stops are more precise. Both are measures of your aperture settings i.e. how much you open up the diaphragm in your lens.
- cinema camera vs DSLR vs Mirrorless – Read more about this in my Filmmaking Basics Article.
- correctly lighting a scene and your subject’s face – you must have enough light in your scene and be using light correctly (soft vs hard light) in order to tell your story.
How to Master Manual Settings
Post-Production & Video Editing
This is the part of filmmaking that takes up 80% of the time.
The shoot itself is a small portion of the filmmaking process. In reality, the screenwriting takes the longest. But in terms of the production process, it’s post-production that eats up all your time and energy. That’s why it’s so critical you only choose projects that you’re going to be passionate about for a while!
Video Editing IS Filmmaking
A film is made in the editing suite.
That’s where you take your vision and turn it into reality. It’s also where you fix all the mistakes you made and do the best you can to make it work. Sometimes things are unworkable and you’re forced to do a re-shoot.
If you want to become a filmmaker, you have to become an editor.
Many would-be solo filmmakers never pursue their dream because they’re afraid of video editing. If you’re one of those people, toss that idea right now. It’s not hard to get started. It’s hard to become an incredible editor. But it’s not hard to become proficient.
These are just a few of the basics of video editing:
- Organization – how you organize your footage is critical. If you don’t organize your work properly you’ll never ever become a good editor. Rule of thumb: organize so that someone else could take over your edit.
- Timeline – this is where you pull in your footage and build your edit.
- Stringout – this is something some editors use to organize all the good takes. You can create a timeline of all the usable footage and then use a double-timeline method of editing. (This is a super-fast and intuitive way of editing.)
- L Cuts – this is when the audio from the previous clip/scene plays for a short moment underneath the image from the next scene. It looks like an L when you view it in the timeline. It’s common for dialogue scenes. You cut to Character B while Character A is still talking so you can see the reaction.
- J Cuts – this is the opposite of the L Cut. Your going to hear the sounds of the next scene/clip before you cut to the image. It preps the audience for what’s about to happen while still allowing the current image to settle into the audience’s mind. Useful for speeding up a scene while still keep your audience with you.
- Jump Cuts – these are common on YouTube. It’s simply cutting a continuous clip into a bunch of pieces that essentially jump around with no attempt at continuity.
- Cutaways – this is technically something that was created through shot planning and storyboarding. You cut from your main scene to something that has not previously been shown. Ex: Cut from medium wide shot of two people talking to the dog on the floor whose ears perk up as he hears something. This is useful if you’re having trouble matching action due to continuity issues.
- Inserts – again this was created through planning. You cut from the main action to a close up of something within the scene that’s critical. Ex: You cut from a medium shot of a guy checking his watch to the close up of the watch.
- Match cuts – here’s where you match similar action from one shot to the next. A great example of this is in the film Layer Cake. There’s a close up on the character’s eyes framed by a black balaclava as we push in on his eyes we’re in his house and then we pull out and reveal his new location at his nemesis’ home.
Get the Run Down on 9
Important Cuts for Video Editors
Editing the Sound
Most video editors don’t learn how to do this at a professional level. That’s because it’s damn difficult. It’s an art all to itself. That said if you’re a solo filmmaker you’re probably going to have to do this proficiently. You won’t be a master. But that’s okay.
Sound is half the battle when it comes to filmmaking. Learning to choose your music and do some rudimentary dialogue editing will come in handy.
I use Premiere Pro to do my video editing and to get the rough cut for any dialogue or audio tracks. Then I take my audio into Adobe Audition to refine it.
I also use iZotope to clean up anything that’s particularly tricky.
On a feature film or even a short film made with a team, you’ll have a video editor pass off the audio to a dialogue editor, who will then pass it off to a sound designer. The sound designer then usually passes it off to studio who will master it. If you’re lucky, you can find someone who will do all of that for you. Those people exist, and they’re amazing!
Working with a Sound Designer
The main thing you need to know when working with a sound designer is that they won’t like you very much if your dialogue tracks are crap. That’s why capturing clean audio on set is so important. Well, also because aside from your sound designer hating you, you’ll also hate your finished product if it has crappy audio.
As a solo filmmaker creating work for the online space, your aim is always to get nice clean audio. This means you won’t have to do much work in prepping your final product. The level required of you for online films is much lower than if you’re screening something in Dolby Digital Surround in a big theatre.
Colour Correction and Grading
This two-step process starts with fixing any errors in colour.
Maybe one shot looks a little cooler than the next. You need to go through your entire film and make sure there is continuity of colour. All shots must match within a scene. You may also have to adjust exposure slightly. You can do all of this in Premiere Pro if you’re working on something that’s just for online use.
But if you’re creating a project for the big screen, you’ll probably want all of this done in a dedicated colour grading software like DaVinci Resolve.
After your film has been colour corrected, you’ll get to the art part.
You’ll adjust the colour of your entire film and each scene so that it helps to tell the story. You’ll work with a colourist in order to make sure you get exactly what you need. To make your life easier, you might want to speak with your colourist before you start your edit so you know what format they need everything in.
Prepping for a Screening
If you’re going to be screening a film at a film festival then you’re going to need a little something called a DCP.
That stands for Digital Cinema Package. You can make this thing yourself and stick it on a hard drive. Or you can have one made for you by a studio that specializes in that and other things.
>>The best explanation I’ve found about DCPs comes from the people at Hermosa Beach Filmworks.
“Simply put, a DCP is the digital equivalent of a 35mm film print. It is what you give to a commercial theater so that they can screen your movie on a digital (also known as “D-Cinema”) projector. Like a 35mm print, a DCP is a world-wide standard. If you walk into any D-Cinema theater, anywhere in the world, they can play your DCP without a problem.” – Hermosa Beach Filmworks
Software for Post Production
Video, Audio Editing, & Colour Grading
- Final Cut Pro $300 UDS – best for Mac
- DaVinci Resolve – Free – for video editing and colour grading
- DaVinci Resolve Studio – $300 USD or free with purchase of Blackmagic Camera – for video editing and colour grading
- Adobe Premiere Pro CC – $20 USD per month forever… Yes this subscription does add up, but it’s one of the most important investments you’ll make in your filmmaking tool kit. I use the entire Adobe CC suite for photo editing, graphic design, effects, video editing, and sound editing. I spend about $800 USD per year, every single year on this damn software. Sigh. But I love the software so I’m not complaining. If I could have only one software system it would be the Creative Cloud Suite.
- Adobe After Effects – For creating effects and animation.
- Adobe Audition – For audio editing and sound design.
- Pro Tools – Industry standard for sound design. It’s what the Pros use.
- iZotope RX-7 – For cleanup of sound problems. I’ve had to buy it because of some sound issues I dealt with that I couldn’t fix any other way. Buy it for $300 or rent to own at $16/month for 25 months.
- Neat Video – This is a plugin that you can use to remove noise. Very handy! But don’t buy it til you need it. But it once for $100 bucks and use it over and over again.
- Red Giant Universe – Plugin that you can use to add effects and transitions. I use this software because I’m kind of a 90s freak. And I love using some of the effects and transitions this software has. It’s a stupid amount of money. $200USD per year. But, I dunno, I love software. But if I needed to hack my budget, then I’d get rid of this.
- Red Giant Magic Bullet Suite – A whole suite of plugins that allow you to colour grade your footage, remove noise, add effects and transitions. This is for serious video editors who do the work every day.
The End
Obviously, there’s more to learn, but as always when writing a huge post, I’ve run out of steam. So just keep coming back to this blog for more learning. Or join me and get emails twice per month with free filmmaking tips and links to the latest filmmaking articles I’ve written.
STORY ENVELOPE FILMMAKING LETTER
Get filmmaking tips to your inbox once per week, plus the free Mini Filmmaking Course.
Join 2000+ filmmakers, and get filmmaking tips, lessons, gear tips, stories, and motivation! Also, whenever I write an epic (ultra long and useful) blog post about filmmaking, I’ll send it to you.
Learn Filmmaking — Keep Reading:
➩ How To Get (Beautiful!) Blurry Backgrounds For Your Photos and Videos
➩ Filmmaking Techniques for Lighting the Human Face
➩ The Filmmaking Basics Every Beginner Needs to Know
➩ Three Basic Rules of Visual Storytelling for Filmmaking
➩ How I Got Paid to Learn Documentary Filmmaking
➩ The 10 Elements of a Good Story for Filmmaking (and everything else)
➩ The Definitive Guide to Manual Exposure for Photo and Video
➩ Filmmaking Tools: It Might Be You…Or It Might Be Your Tools

About the Author
Hi! I’m Colette Nichol. I’m a solo filmmaker and story strategist based out of rainy Vancouver, Canada. I’ve been making videos and micro films for small businesses and global brands since 2014.
Plus, I LOVE to help aspiring filmmakers pursue their dreams and start making films. This blog is designed to help you gain the knowledge you need to become a filmmaker.
If you want more, get on the waitlist for the Story Envelope Academy Solo Filmmaking Mentorship Program. It opens up one time per year and is the best way to become a filmmaking or video pro fast!
CLICK HERE to get on the solo filmmaking mentorship waitlist.
")